Sunday, January 30, 2011

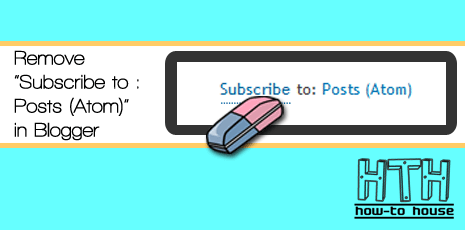
Another Method To Remove "Subscribe to: Posts (Atom)" in Blogger


Previously, HOW-TO HOUSE share a tutorial about How To Remove "Subscribe to: Posts (Atom)" in Blogger. In some template, it won't work. So, you can use this method to remove or hide the "Subscribe to: Posts (Atom)". You only need a simple hack code to add into your Edit HTML section. 

 
Steps :
1. Go to your Dashboard >> Design >> Edit HTML.

2. Search this code (Ctrl + F), ]]></b:skin> 

3. Paste the code below, just above ]]></b:skin>
.feed-links {
display:none;
}

4. Save your template. DONE!

Refresh your blog to see the result.

Wednesday, January 26, 2011

How To Create Free Blog with Blogger (Step-By-Step Tutorial)

Blog?

Blog is short for "Web log", which is a a web application containing note or writing that are usually called "post" and displaying on the web pages. "The posts" displayed orderly based on based on the time when the writing is written and published. So when you view a blog, latest post was on top of the blog and the last pages is the first post for the blog.


Create Free Blog with Blogger

You can have a free blog using a service provided by Blogger.com. Blogger.com platform is the most preferred by many blog users because it is easy to maintain and it is a useful platform to the beginner. With blogger.com, you get the domain name as of blogspot sub domain, example yourname.blogspot.com.


Free Sign Up with Blogger.com

Read here for English Version 

Baca sini untuk versi Melayu


To learn more about blogger : Blogger Tutorial
To add widget on your blog : Blogger Widget
For more blogger hack : Blogger Hack

This tutorial requested by Rahmat Hassan

Tuesday, January 25, 2011

How To Show Post Title Only on Your Blogger HomePage

* Updated : 26 Jan 2011 * 

Do you like to show only your blogger post title on your home page? This hack can make your homepage more look professional and shorten your homepage. It' looks like this. [screenshot]

Only title on Your Homepage
How to do it? Follow the easy steps below :

  • Dashboard > Layout > Edit HTML
  • Find ]]></b:skin>
  • Copy this code and paste it just below ]]></b:skin>
  • Save your template. DONE!

>> To change your number of post on main page :
  • Go to Dashboard > Design > Page Elements.Click on "Edit" on Blog Posts Section.

  • DONE!

Try this bloggers!!

How To Fix "Cannot Find a Feed" On Blogger

Have you ever had a problem "Cannot Find a Feed" on your blog? If so, HOW-TO HOUSE will share how to correct it. You only need to add the snippet code in the HTML Edit your blog. This is a problem of Blogger users can be easily fixed. So, let's do it :


1. Go to your Dashboard >> Design >> Edit HTML >> Check Expand Widget Templates.

2. Search this code (Ctrl + F), <head> 

3. Then, add this code, directly below <head>  tag.

4. Save your template & DONE!


You have added a feed link to your template that can be quickly found.

Friday, January 21, 2011

How To Partitioning or Resize Hard Drive in Windows 7

Do you want to partitioning your hard drive in windows 7 but did not know how? Or you want to resize your hard drive? It use to be the same method in windows vista. For more details, HOW-TO HOUSE will share a tutorial to partitioning and resize your hard drive in windows 7. Let's check this video.


Partition Hard Drive :


Resize Hard Drive :


How is it? Is this video tutorial help you? This video tutorial gives you a well knowledge to do the stuff about your Hard Drive.


Source : Flandersir and TigerDirectTV

Sunday, January 16, 2011

How To Save Windows Movie Maker as HD in Windows 7


Windows 7 users have some problem to save Windows Movie Maker (WMM) video as High Definition (HD) format such as HD 1280x720, HD 1440x1080, HD 1920x1080 or HD 960x720 just like in the Windows Vista. So, HOW-TO HOUSE  want to share tutorial how to save Windows Movie Maker as HD video in Windows 7. So, let's start guys.

But first, you need to download :

1. Of course WMM. You can get it here. Download Windows Movie Maker 6.0 (Latest Version) :

WMM 6.0 for x32 bit operating system

WMM 6.0 for x64 bit operating system

2. WMM HD Plugin

3. WMM HD dll.bat


How to :

1. Run WMM HD dll.ba.

2. Then, extract WMM HD Plugin. Copy the Profiles folder into this Directories :
C:\Program Files\Windows Movie Maker 6.0\Shared

3. Paste the files into Shared folder.

4. You're almost done. Open your WMM 6.0. Try to create any video then publish. To publish in HD, press CTRL + P. That's the trick. [Important]

5. Then, the options to save as HD ready to work for you.

6. That's all. ENJOY!


Video tutorial :


Is this tutorial helpful? Recommend it! For further question, just drop your comment.

Friday, January 14, 2011

How To Earn Money with Adf.ly

Adf.ly is an easy way to earn money through your blog. Why? Adf.ly will pay for you to just shorten your url with Adf.ly. This is one way to get money through a blog. (Free Registration : Adf.ly)

adf.ly - shorten links and earn money!

What is Adf.ly ?

Adf.ly are a free URL shortening service. Get paid to share your links on the Internet!  Just register for an account and start shrinking.  You get paid for every person that visits your URLs. Isn't that sounds good? Register now!

How Adf.ly Works ?

Earn more than $4.00 / 1000 visitors to your links.  Get tiny URLs, great for when text space is limited.  All advertising is strictly family-safe with no popups.  Real-time statistics with revenue breakdown.  Refer users and get a massive 20% commission.  Many tools - Mass Shrinker, Easy Link, API  Easy-to-reach $5.00 minimum payout. Adf.ly payment is via PAYPAL. You can check Adf.ly payout rates here.

* You need a PAYPAL account to received the payment. Guide : Create a Free PAYPAL Account.


How To Join Adf.ly ?


1. It's a free registration. Just go to this link.

2. Click on the Join Now.


3. Then fill in the registration form and Submit.


4. Now, you're ready to earn some money by shrinking your URLs and share it to the world.


URL sample : Shorten HOW-TO HOUSE URL >>  http://adf.ly/FOYi


adf.ly - shorten links and earn money!
Get paid to share your links!


Start earning now! :)

Thursday, January 13, 2011

How to Change Blogger Favicon on Blogspot

Do you know what is Favicon? Favicon is abbreviation for website icon. For more clearly look at the screenshot below. Change your favicon can make your blog looks more professional. If you wanna change it into your own favicon. Just follow this tutorial.


1. Upload your Image (JPG, PNG, GIF) to IconJ.com

2. It's totally FREE. No registration needed. Just upload your image directly and generate it.


3. When you finish uploaded, copy the generated code.


4. Then, go to your Blogger Dashboard >> Design >> Edit HTML.

5. Find (Ctrl + F) </head> tag , then paste the code below it.


5. Also, you can host yourself your favicon.ico. Change the ico URL with your hosted icon.

6. Just copy the code below, paste it below </head> tag
<link rel="shortcut icon" href="YOUR HOSTED FAVICON.ICO URL" />

7. Save & DONE!

How is it? Nice and simple. All the best guys! 

Wednesday, January 12, 2011

How To Add Plus Size Image Viewer in Your Blog

Want to show something new on your blog? What if you try "Plus Size Image Viewer" on your blog. Plus Size Image Viewer is an attractive method to enlarge or zoom  the image without open the new tab. Plus Size Image Viewer automatically adds a caption beneath the images of your choice that when clicked on launches a "plus size" version of the image. The enlarged image can be a different image from the original, so the former is loaded only on demand when requested. How is it works? Watch the demo below :


So, how is it? You wanna add it? Follow this tutorial.

1. Go to your Dashboard >> Design >> Edit HTML >> Check Expand Widget Templates.

2. Search this code (Ctrl + F), </head> 

3. Then, add this code below, above it :
<link href='https://sites.google.com/site/howtohouse/hth-scripts/howtohouse-plusimageviewer.css' rel='stylesheet' type='text/css'/>

<script src='http://ajax.googleapis.com/ajax/libs/jquery/1.3.2/jquery.min.js' type='text/javascript'/>

<script src='https://sites.google.com/site/howtohouse/hth-scripts/howtohouse-plusimageviewer.js' type='text/javascript'>

/***********************************************
* Plus Size Image Viewer- by JavaScript Kit (www.javascriptkit.com)
* This notice must stay intact for usage
* Visit JavaScript Kit at http://www.javascriptkit.com/ for full source code
* Shared by HOW-TO HOUSE at www.place2how-to.com
***********************************************/

</script>

4. Save your template.


To add a "Plus Size Image Viewer" to any image,

1. Insert the two attributes in red inside the image's IMG tag :
<img src="YOUR IMAGE URL" data-plusimage="YOUR IMAGE URL" data-plussize="800,600" />

2.  Example code for image above, look something like this :
<img  src="https://blogger.googleusercontent.com/img/b/R29vZ2xl/AVvXsEhs5z6BoPKMd8ggKhbORfQYRfoGZHUJp3vRyooy0p9TPLPAcUqpPjILu53-RHd-BEH8UxZrJn59N-NCaMEKCz7ku6_KQ1YYz0SBmhYSKfBGyIMM0gwem6KsA-YZzuRNjHgp_oIq7Qt0ymo/" data-plusimage="https://blogger.googleusercontent.com/img/b/R29vZ2xl/AVvXsEhs5z6BoPKMd8ggKhbORfQYRfoGZHUJp3vRyooy0p9TPLPAcUqpPjILu53-RHd-BEH8UxZrJn59N-NCaMEKCz7ku6_KQ1YYz0SBmhYSKfBGyIMM0gwem6KsA-YZzuRNjHgp_oIq7Qt0ymo/" data-plussize="800,600"/>

3. Preview it. If it's ok, you are succeeded. DONE!

It definitely gives a different look to your blog. Your blog will look more attractive and professional. GOOD LUCK!


source : JavaScript Kit


Facing any problem? Just drop your comment! :D

Monday, January 10, 2011

How To Hide Shoutbox in Blogger


Shoutbox is a very useful widget for bloggers to communicate more easily. It also important widget for blogger to pay back a visit to the visitor's blog. But do you wanna hide your shoutbox  widget? You can do it by following this tutorial. You also can add another style of shoutbox appear, How To Make Floating and Click To Appear Shoutbox.


* Updated code : 9th september 2011 *

1. Go to your Dashboard >> Design >> Page Element >> Add a Gadget.


2. Paste this code below in it :
<style type="text/css">
    #gb{
    position:fixed;
    top:50px;
    z-index: 1000;
    }
    * html #gb{position:relative;}

    .gbtab{
    height:100px;
    width:30px;
    float:left;
    cursor:pointer;
    background:url('https://blogger.googleusercontent.com/img/b/R29vZ2xl/AVvXsEgiFtz4c2jIdCKIVhoN5TM2Vzn4saU-OBANhZq4b7du8zlUZ7BaGnNpuOzOol9QLpJiHUVYcS9Zt9NQTsMgXbPtRe3dWFVaApJHmbdnPHxkUVMJDX5HnUWHTuR4MyHN6G39cSXYrwix5Xc/') no-repeat;
    }
    .gbcontent{
    float:left;
    border:2px solid #666666;
    background:#F5F5F5;
    padding:10px;
    }
    </style>

    <script type="text/javascript">
    function showHideGB(){
    var gb = document.getElementById("gb");
    var w = gb.offsetWidth;
    gb.opened ? moveGB(0, 30-w) : moveGB(20-w, 0);
    gb.opened = !gb.opened;
    }
    function moveGB(x0, xf){
    var gb = document.getElementById("gb");
    var dx = Math.abs(x0-xf) > 10 ? 5 : 1;
    var dir = xf>x0 ? 1 : -1;
    var x = x0   dx * dir;
    gb.style.right = x.toString()   "px";
    if(x0!=xf){setTimeout("moveGB(" x ", " xf ")", 10);}
    }
    </script>
    <div id="gb">
    <div class="gbtab" onclick="showHideGB()"> </div>
    <div class="gbcontent">
<div style='text-align:left; '>
<p>

<a alt="HOW-TO HOUSE" style="text-decoration:none" href="http://adf.ly/GRc0" target="_blank">[?]Add this shoutbox style</a>

</p>
<div/>

PASTE YOUR SHOUTBOX CODE HERE

    <div style="text-align:right">
    <a href="javascript:showHideGB()">
    [close]
    </a>
    </div>
    </iframe>
</div></div></div>
    </div>
    <script type="text/javascript">
    var gb = document.getElementById("gb");
    gb.style.right = (30-gb.offsetWidth).toString()   "px";
    </script>

Customization

50px = Change to any value. Higher value, lower position of shoutbox.

https://blogger.googleusercontent.com/img/b/R29vZ2xl/AVvXsEgiFtz4c2jIdCKIVhoN5TM2Vzn4saU-OBANhZq4b7du8zlUZ7BaGnNpuOzOol9QLpJiHUVYcS9Zt9NQTsMgXbPtRe3dWFVaApJHmbdnPHxkUVMJDX5HnUWHTuR4MyHN6G39cSXYrwix5Xc/ = You can change with your own shoutbox icon.

#666666 = Shoutbox border color.
 
#F5F5F5
= Shoutbox background color.

PASTE YOUR SHOUTBOX CODE HERE = Replace with your Shoutbox code.


3. Save & DONE! 

Now, your shoutbox will be hidden at the left side of your blog.  ENJOY! 


Requested by Chriz George

Add Recent Post Widget in Blogger


You wanna display your recent post on the sidebar? Recent Post Widget will display your previous entries. This widget is very useful for visitors to see your entry before the entry date. If you are not using the archive widget, widgets recent post is suitable for use as a display of the previous entry. Just follow this easy steps :


1. Go to your Dashboard > Design > Page Element > Add a Gadget.


2. Paste this code below in it :
<script style='text/javascript' src='http://blogergadgets.googlecode.com/files/recentpostswidgetv1.js'></script><script style='text/javascript'>var numposts = 5;var showpostdate = false;var showpostsummary = false;var numchars = 100;</script><script src='YOUR BLOG URL HERE/feeds/posts/default?orderby=published&alt=json-in-script&callback=showrecentposts'></script><span style='font-size: 80%'>Powered by <a href='http://www.place2how-to.com/2011/01/add-recent-post-widget-in-blogger.html'>HOW-TO HOUSE</a></span><noscript><br /></noscript>

Change the bold code :
var numposts = 5 - represent the number of post will be shown.
 YOUR BLOG URL HERE - replace with your blog URL.

3. Save it & DONE!

Refresh your blog & see the result.

Sunday, January 9, 2011

How To Highlight Author Comment in Blogger

In the blogger comment form, there is nothing to distinguish whether the comments from the blog author or blog visitors. If you wanna highlight blog author comment in blogger comment form, you can highlight it by follow this tutorial provided. 

Author comment highlighted!

Just need to add a little blogger hack code. Let's start :

1. Go to your Dashboard >> Design >> Edit HTML >> Check Expand Widget Templates.

2. Search this code (Ctrl + F), </head>


3. Then, add this code below, above it :
<style>
.comment-body-author {
background: #FEF9EA;
color: #333333;
border-top:1.2px dotted #002F66;border-bottom:1.2px dotted #002F66 ;border-left:1.2px dotted #002F66;border-right:1.2px dotted #002F66;
line-height: 1.4em;
margin:0;
padding:0 0 0 20px;
}
</style>

You can change : 
#FEF9EA = background color
#333333 = text color
1.2px = border size


You also can use image as a background, use this code :
<style>
.comment-body-author {
background: #FEF9EA;
color: #333333;
background: url(URL OF YOUR BACKGROUND IMAGE) ;
border-top:1.2px dotted #002F66;border-bottom:1.2px dotted #002F66 ;border-left:1.2px dotted #002F66;border-right:1.2px dotted #002F66;
line-height: 1.4em;
margin:0;
padding:0 0 0 20px;
}
</style>

4. Once it done, find this code or something like this :
<data:commentPostedByMsg/>
</dt>

<b:if cond='data:comment.author == data:post.author'>
<dd class='comment-body-author'>
<p><data:comment.body/></p>
</dd>
<b:else/>

<dd class='comment-body' expr:id='data:widget.instanceId   data:comment.cmtBodyIdPostfix'>
<b:if cond='data:comment.isDeleted'>
<span class='deleted-comment'><data:comment.body/></span>
<b:else/>
<p>
<data:comment.body/>
</p>
</b:if>
</dd>

</b:if>

You only need to add the red code correctly!

5. Save your template & DONE!


Now, your comment will be highlighted as blog author.

Saturday, January 8, 2011

How Much is Your Website or Blog Worth?

You wanna know the value of your website or blog? When you want to sell you blog or website, easier to determine the proper price. LOL. 

Let's start to count your website value. You can check your website worth at BizInformation :

BizInformation is a free web-based valuation service, providing website information, visitor statistics and an estimated website value. Just enter a domain name into the box to view a full report. We try our best to provide accurate information, but this is not always guaranteed. Further research and confirmation of details is required. - BizInformation.

1. Go to BizInformation.org

2. Just enter your website or blog URL. Then, click 'Value' button.


3. And see the results. You can put your website value by put the provided code into your website or blog.


HOW-TO HOUSE worth :


How about your website?

Beside the website value, BizInformation also features your Daily Pageviews, Daily Visitors, Worldwide Ranking, and External Links.

Try it out!

How To Disable Right Click in Blogger


Right click ease some of work when surfing the Internet. However, right-click make copy and paste activity of other people much easily. You actually can disable right click to keep your article from the copy paste activities. You want to disable your right click function? Just use this script. Follow this tutorial in only 3 steps.

1. Go to your Dashboard > Design > Page Element > Add a Gadget.


2. Paste this code below in it :
<script language=JavaScript>
<!--

//Disable right click script III- By Renigade (renigade@mediaone.net)
//For full source code, visit http://www.dynamicdrive.com
//Sharing credits : www.place2how-to.com

var message="";
///////////////////////////////////
function clickIE() {if (document.all) {(message);return false;}}
function clickNS(e) {if
(document.layers||(document.getElementById&&!document.all)) {
if (e.which==2||e.which==3) {(message);return false;}}}
if (document.layers)
{document.captureEvents(Event.MOUSEDOWN);document.onmousedown=clickNS;}
else{document.onmouseup=clickNS;document.oncontextmenu=clickIE;}

document.oncontextmenu=new Function("return false")
// -->
</script>

3. Save and DONE!

Refresh your blog and see the results.

Friday, January 7, 2011

How To Remove Image Links in Blogger

Image is an attractive decoration in an entry on your blog. But if you put too much images, it will cause your blog loading slowly. And if we click on the image, the browser continues to display that image in the new page. We have to load the page again to read the article. It will distract your blog reader. So, do you want to remove the image link in blogspot Blogger? Follow this very simple tutorial. There is 2 methods. Check it out.

Let's remove this image link.

With link
Link removed

Method 1 :

1. In Post Editor section, when you upload an image, go to Edit HTML section to remove the link on image.


2. Then, find the image code. In this case, the image code is :
<a href="https://blogger.googleusercontent.com/img/b/R29vZ2xl/AVvXsEhuXllVA8xMFD5fJf1-jFhynhiH67Jta_qkvneodiPvqme_75azL_O272iL61K9_QdVgxf1jXDkGGD_7WkzfKRWMGhi4XrFxfoXxEWnt8sXOQzTMvCnFOqiYxAn1n7c1BV9ets9b0BxkKE/s1600/howtohouse-link-nonlink-image.png" style="margin-left: auto; margin-right: auto;"><img border="0" src="https://blogger.googleusercontent.com/img/b/R29vZ2xl/AVvXsEhuXllVA8xMFD5fJf1-jFhynhiH67Jta_qkvneodiPvqme_75azL_O272iL61K9_QdVgxf1jXDkGGD_7WkzfKRWMGhi4XrFxfoXxEWnt8sXOQzTMvCnFOqiYxAn1n7c1BV9ets9b0BxkKE/s1600/howtohouse-link-nonlink-image.png" /></a>

3. Delete bold code shown below. The code with <a href= -----------> and  </a> .This code direct you to the image link.
<a href="https://blogger.googleusercontent.com/img/b/R29vZ2xl/AVvXsEhuXllVA8xMFD5fJf1-jFhynhiH67Jta_qkvneodiPvqme_75azL_O272iL61K9_QdVgxf1jXDkGGD_7WkzfKRWMGhi4XrFxfoXxEWnt8sXOQzTMvCnFOqiYxAn1n7c1BV9ets9b0BxkKE/s1600/howtohouse-link-nonlink-image.png" style="margin-left: auto; margin-right: auto;"><img border="0" src="https://blogger.googleusercontent.com/img/b/R29vZ2xl/AVvXsEhuXllVA8xMFD5fJf1-jFhynhiH67Jta_qkvneodiPvqme_75azL_O272iL61K9_QdVgxf1jXDkGGD_7WkzfKRWMGhi4XrFxfoXxEWnt8sXOQzTMvCnFOqiYxAn1n7c1BV9ets9b0BxkKE/s1600/howtohouse-link-nonlink-image.png" /></a>

4. Delete the code and hit preview button. If you can't click on the image, image link is removed. DONE!

Note : If error notice appear, ignore it. Blogger Post Editor will repair the error itself.


Method 2 :

1. Click on the image, if there is an option like screenshot below. Just click the remove button.


2. Image link is successfully removed. DONE!

Hopefully this tutorial can help you. Good luck!

Wednesday, January 5, 2011

How To Remove "Showing new post with label" in Blogger

When you select a label or when searching for something using search box on the blog, then the display will begin with the following notification :


Without it, it gives the professional look to your blog. If you want to remove it, you can follow this tutorial.

Steps :

1. Go to your Dashboard >> Design >> Edit HTML >> Check Expand Widget Templates.

2. Search for this code :

<b:includable id='status-message'>

3. Then, you need to identify the whole code. It will look something like this :
<b:includable id='status-message'>
<b:if cond='data:navMessage'>
<div class='status-msg-wrap'>
<div class='status-msg-body'>
<data:navMessage/>
</div>
<div class='status-msg-border'>
<div class='status-msg-bg'>
<div class='status-msg-hidden'><data:navMessage/></div>
</div>
</div>
</div>
<div style='clear: both;'/>
</b:if>
</b:includable>
3. Then, replace the whole code with the code below.
<b:includable id='status-message'>
<b:if cond='data:navMessage'>
<div>
</div>
<div style='clear: both;'/>
</b:if>
</b:includable>
4. Save your template. DONE!

Now, the notification will not appear anymore. All the best!


Like it? Recommend it!

How To Display Widget on Any Specific Post Page or Home Page Only in Blogger

Does your blog have a lot of widgets? Widget will appear on your Home page and on all your Post pages. Sometimes, this widget will slow down the loading on your page. Now you can choose to display your widget on any post page your want. You will edit this widget in the Edit HTML. So, let get started.

How to find each widget code in Edit HTML section:

Each widget have a unique title. Such as Labels, Followers, Recent Comments, etc. Each unique title is an ID to the widget which you'll find in the Edit HTML. So, to edit the widget easier, give a title for your widget.

Try to find your widget :

- Go to your Dashboard > Design > Edit HTML > Check Expand Widget Templates.

- Search this code <b:widget id=

- You will found something like this :

<b:widget id='HTML1' locked='false' title='UNIQUE TITLE OF YOUR WIDGET' type='HTML'>

Now, you can edit your widget. Let's go.


Display a Widget on Home Page Only :

Just add the red code, just like the code shown below.
<b:widget id='HTML1' locked='false' title='UNIQUE TITLE OF YOUR WIDGET' type='HTML'>
<b:includable id='main'>
<b:if cond='data:blog.url == data:blog.homepageUrl'>
<!-- only display title if it's non-empty -->
<b:if cond='data:title != &quot;&quot;'>
<h2 class='title'><data:title/></h2>
</b:if>
<div class='widget-content'>
<data:content/>
</div>

<b:include name='quickedit'/>
</b:if>
</b:includable>
</b:widget>

Hide Your Widget from Home Page :

Just add the red code, just like the code shown below.
<b:widget id='HTML1' locked='false' title='UNIQUE TITLE OF YOUR WIDGET' type='HTML'>
<b:includable id='main'>
<b:if cond='data:blog.pageType == "item"'>
<!-- only display title if it's non-empty -->
<b:if cond='data:title != &quot;&quot;'>
<h2 class='title'><data:title/></h2>
</b:if>
<div class='widget-content'>
<data:content/>
</div>

<b:include name='quickedit'/>
</b:if>

</b:includable>
</b:widget>

Display a Widget on Specific Post Page :

Just add the red code, just like the code shown below.
<b:widget id='HTML1' locked='false' title='UNIQUE TITLE OF YOUR WIDGET' type='HTML'>
<b:includable id='main'>
<b:if cond='data:blog.url == "SPECIFIC POST URL"'>
<!-- only display title if it's non-empty -->
<b:if cond='data:title != &quot;&quot;'>
<h2 class='title'><data:title/></h2>
</b:if>
<div class='widget-content'>
<data:content/>
</div>

<b:include name='quickedit'/>
</b:if>
</b:includable>
</b:widget>

Hide a Widget on Specific Post Page :

Just add the red code, just like the code shown below.
<b:widget id='HTML1' locked='false' title='UNIQUE TITLE OF YOUR WIDGET' type='HTML'>
<b:includable id='main'>
<b:if cond='data:blog.url != "SPECIFIC POST URL"'>
<!-- only display title if it's non-empty -->
<b:if cond='data:title != &quot;&quot;'>
<h2 class='title'><data:title/></h2>
</b:if>
<div class='widget-content'>
<data:content/>
</div>

<b:include name='quickedit'/>
</b:if>
</b:includable>
</b:widget>


Tips : If you not put the Unique title on the widget, you can still find the widget. Position of the widgets will be arranged in descending order according to your widget arrangement on the Page Element section. For example, your untitle widget located below the Recent Post widget. Then in the Edit HTML section, your untitle widget is under the Recent Post widget. Your untitle widget will appear with this code : <b:widget id='HTML1' locked='false' title='' type='HTML'/> 


Hope this tutorial useful for you guys! Good luck!

Recommend this tutorial to your friends!
Tuesday, January 4, 2011

How To Shorten Website URL


Assalamualaikum!

Do you know what is Shorten URL Generator? It is a generator that is used to shorten your long URL. The long URL sometimes difficult for our visitors to remember the website. But by using this generator, your URL will be much shorter and easier to remember. HOW-TO HOUSE share the 10+ collection of Shorten URL generator website and it's fully worked.

Example,

HOW-TO HOUSE URL :  


:: using adf.ly Shorten URL generator. Let's try it!

Here we go :

1. goo.gl

2. adf.ly

3. bit.ly

4. Tki.me

5. TinyURL

6. Asso.in

7. Short.URL123

8. ClickLR

9. P6X.net

10. 247u.info

11. x61.ch


That's the top 10 worked and able to shorten your URL by HOW-TO HOUSE. TRY IT! :D 

Do you think this article useful? Recommend it to your friends!

Saturday, January 1, 2011

How To Add Facebook "Dislike" Button to Facebook


We are already too familiar with the functions of facebook 'Like' button, which we 'Like'ing friend's status or comment. Wanna try something with your facebook such as a 'Dislike' button ?Only need to install add-on to your browser and you will get this Dislike button. It's called FBD (Facebook Dislike).

Facebook "Dislike" button
Example of  "Dislike" button on HTH fan page

Get it now! Install this add-on :

FBD for Mozilla Firefox

FBD for Google Chrome


You also can find the FBD on facebook, here.

:: FBD only supported the following browsers at this moment.

Note :  Dislike button is not visible by any other facebook users unless FBD installed on their computer or laptop.


If you interested with FBD, recommend it to your friends!


Followers

Sponsor

 
Powered by Blogger.