Thursday, December 30, 2010

How To Hide Sidebar and Footer in Blogger Post or Pages

We alerady know what is post or entry. But some still don't know what is Static pages. Static Page is a new function introduced by Blogger.com to its user. You want to know more about these Pages. Read about it here. What Are Pages?

Now you would have more understood about the Pages. The function is very useful to bloggers. Are you thinking to make a static page without the sidebar and footer? Just wanna put your big nice picture? or your favorite video? If so, you may do so by following this tutorial.


Let start :

Note : Save your template before making any changes.

1. Go to your Dashboard > Design > Edit HTML > Check Expand Widget Templates.

2. Find </head>

3. Simply copy and paste code below, above </head> tag,
<b:if cond='data:blog.url == &quot;YOUR ENTRY/PAGES URL HERE&quot;'>
<style>
.header,.sidebar,.footer {display:none;}
#outer-wrapper {width: 1000px; padding:0;}
#main-wrapper{width: 95%; float: none; margin: 0 auto;}
</style>
</b:if>
<!--by HTH - http://www.place2how-to.com/-->

4.  Change YOUR ENTRY/PAGES URL HERE to your URL.

5. Save and preview. If there are no errors, you have succeeded! DONE!


[ + ] Add background image :

1. Go to your Dashboard > Design > Edit HTML > Check Expand Widget Templates.

2. Find </head>

3. Simply copy and paste code below, above </head> tag,
<b:if cond='data:blog.url == &quot;YOUR ENTRY/PAGES URL HERE&quot;'>
<style>
.header,.sidebar,.footer {display:none;}
#outer-wrapper {width: 1000px; padding:0;}
#main-wrapper{background:url(BACKGROUND IMAGE URL HERE); width: 1000px; margin: 0;}
.post {padding: 20px; }
.post h3 a {font-size:160%;}
</style>
</b:if>
<!--by HTH - http://www.place2how-to.com/-->

4. Edit the red bold text. You may also change the width value as you desired.

5. Save & DONE!


Feel free to support HOW-TO HOUSE on facebook

Wednesday, December 29, 2010

How To Download All Photo in Facebook Photo Album

Facebook has a function to gather photo in an album. You can add and categorize your photos by albums you want. You wanna download the photos in a photo album? Download all pictures in the photo album at once using the add-on is known as facePAD (Facebook Photo Album Downloader). You can download your own photo album, a friend or fan page. You can download photo album that you want to use facePAD.

To download the photos in Facebook Photo Album, install FacePAD add-on : 


DOWNLOAD PHOTO ALBUM
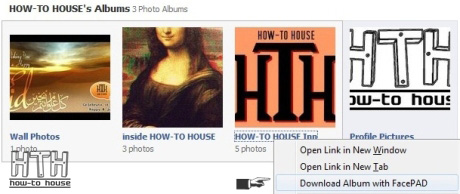
1. Go to any photo album that you want to download, then right click on the Photo Album link, then click on "Download Album with FacePAD" option.


or,


2. A window will pop-up asking to choose a directory/folder where you would like save the photos.

3. Then, the photo album will be downloaded. Photos will be rename according to the photo album.

note : May downloading process will hang for a second to download large file album as it searches through the Facebook album. Then, it will start downloading immediately.


Video tutorial by the Add-on creator :

Enjoy guys! 


Like this tutorial? Recommend it to your friends!

Tuesday, December 28, 2010

How To Add Popular Post Widget by Blogger.com


Blogger.com is becoming more popular and the bloggers choice who want to use the blog for free. As they getting huge and popular, Blogger.com were providing new services to its users, including the latest is Popular Posts Widget. This widget will show you the best  or most popular entries viewed by your blog visitors. You wanna add this widget? Just follow these steps :

1. Go to your Dashboard > Design > Page Element > Add a Gadget

2. Search for Popular Post (New!)


3. Add it by click on the title or click on the (+) icon.

4. You can configure the widget as you desired.


5. Save & DONE!


Does this tutorial help you? Recommend it to your friends!

Friday, December 24, 2010

Add Online Counter in Blogger


We do not know how many visitors to our blog at a time. This widget helps your visitors to find out how many other visitors who also visit your blog at the same time. You want to add the Online Counter widget on your blog? If you want to add this widget, follow this tutorial.

We will use the free online counter provided by whos.among.us. Let's begin :

1. Go to whos.among.us

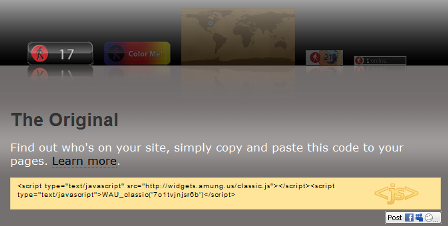
2. Then, scroll down and found this section (screenshot  below).


3. Next, you just need to choose a position where you want to put the widget on your blog. Simply copy the HTML code.

4. Now, go to your Dashboard > Design > Page Element > Add a Gadget > HTML/Javascript.

5. You can place the widget anywhere. It would appear according to the position you have chosen. (step 3).

6. Save and DONE!


MORE ONLINE COUNTER FROM whos.among.us

You can also get online counter with a different appearance from whos.among.us. You only need to :


2. Get 5 more styles for Online Counter widget. You can choose your preference.


3. You only need to click on the widget you want, then copy its HTML code and paste it on HTML/JavaScript.

4. Save and DONE!


Share this tutorial with your friends. If you have any questions , just drop it in the comment section.

Tuesday, December 21, 2010

How To Save Password and Username in Mozilla Firefox


Wanna save your password and username because you want to format your computer or you have a new computer? A password will be lost if we reformat the computer or you can easily remember it. To make it easier to find or remember the password and username, HOW-TO HOUSE has two method to save it. Follow this tutorial :


Method 1 [Manual]

1. Go to My Computer

2. Go to this Directory :
C:\Users\YOUR COMPUTER NAME\AppData\Roaming

3. Copy  folder named "Mozilla". 

4. Keep the folder and put it in the same place [like above directory] after your  laptop formatted.


Method 2 [Tools]

1. Download this tool here or here.

2. Extract it.

3. Run it. It will show your USERNAME & PASSWORD DIRECTLY.


Now you can use your username and password on your formatted or new computer.


#If you have any comments or suggestions, please leave your comments. Your comments are very useful for the development of wisdom here in the HOW-TO HOUSE.

Saturday, December 18, 2010

How To Change Author Name in Blogger


You have more than a blog and want you to want to change the name of the author on your other blog? because your name will appear the same on all your blogs. So to come up with a different name on every blog, you just need to follow this tutorial. It is easy and simple. Let's start :

1. Go to your Dashboard > Design > Edit HTML > Check Expand Widget Templates.

2. Find this code :
<span class='post-author vcard'>
<b:if cond='data:top.showAuthor'>
<data:top.authorLabel/>
<span class='fn'&gt;<data:post.author/></span>
</b:if>
</span>

3.  Change <data:post.author/> with your desired name.

4. Save your template. 

Refresh your blog to see results. 

DONE!

How To Add Contact Me or Email Us Form in Blogger

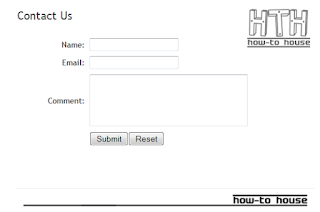
Wanna get connected with your viewer? or receive any response by email form?  Add this form in your blog. You can use this simple form. It will directly send it to your email. The form is look something like this :
 

Just use this code below :


<FORM action="YOUR EMAIL ADDRESS HERE"
method="post" enctype="text/plain"><TABLE BORDER="0" CELLSPACING="0" CELLPADDING="4" WIDTH="90%"><TR><TD width="30%"><DIV align="right"><B>Name:</B></DIV></TD><TD width="70%"><INPUT type="text" name="name" size="20"></TD></TR><TR><TD><DIV align="right"><B>Email:</B></DIV></TD><TD><INPUT type="text" name="email" size="20"></TD></TR><TR><TD><DIV align="right"><B>Comment:</B></DIV></TD><TD><TEXTAREA name="comment" cols="30" wrap="virtual" rows="4"></TEXTAREA></TD></TR><TR><TD>&nbsp;</TD><TD><INPUT type="submit" name="submit" value="Submit"><INPUT type="reset" name="reset" value="Reset"></TD></TR></TABLE></FORM><!--share credit-http://place2how-to.blogspot.com/-->

Change  YOUR EMAIL ADDRESS HERE to your email address. 

DONE!

Friday, December 17, 2010

How To Create a Simple Button

If you want to make a some kind of button to be click by your visitor, you can make it a better one with this method. You not only use a hyperlink to direct your visitor to another site but with a better button, your URL link will look nice. It look something like this :


You only need this code :

Use this code : 
<form action="URL HERE" target="_blank" method="GET">
<input type="submit" value="TITLE OF THE URL HERE">
</form>

Code used for button above is :
<form action="http://place2how-to.blogspot.com/" target="_blank" method="GET">
<input type="submit" value="HOW-TO HOUSE">
</form>


Nice!! 


Recommend this trick to friends!

Hack To Play Youtube Video at a Spesific time

When you wanna watch Youtube, some video you want to skip it until to the specific time. So, you can use this simple URL hack to do it. Just add a parameter at the end of the link, to indicate the minutes and seconds from which to start playing. This is the hack :

1. Go to any Youtube video you want to watch.

2. Just use this URL code hack :

#t=(minute value)m(second value)s.

3. If you want the video to start at 2 minutes 05 second. Simply put this URL code after the Youtube video URL.

#t=02m05s.


Now, you can try it. Nice trick!

Thursday, December 16, 2010

How To Make Blog Background Change Color Automatically

Do you want your blog background changing color automatically like a disco light? You can use this widget. With this widget, your blog background will have a different color. It will keep changing color.

:: DEMO ::

Wanna try it? Just this widget to HTML/JavaScript.

Note : Remove your blog background before using this widget.

1. Go to your Dashboard > Design > Page Element > Add a Gadget > HTML/Javascript.

2. Put this code below, in it :

<!--Start Disco Background[http://place2how-to.blogspot.com/-->
<script language="JavaScript">
<!--
//disco
r=255;
g=255;
b=255;
flag=0;
t=new Array;
o=new Array;
d=new Array;
function hex(a,c)
{
t[a]=Math.floor(c/16)
o[a]=c%16
switch (t[a])
{
case 10:
t[a]='A';
break;
case 11:
t[a]='B';
break;
case 12:
t[a]='C';
break;
case 13:
t[a]='D';
break;
case 14:
t[a]='E';
break;
case 15:
t[a]='F';
break;
default:
break;
}
switch (o[a])
{
case 10:
o[a]='A';
break;
case 11:
o[a]='B';
break;
case 12:
o[a]='C';
break;
case 13:
o[a]='D';
break;
case 14:
o[a]='E';
break;
case 15:
o[a]='F';
break;
default:
break;
}
}
function ran(a,c)
{
if ((Math.random()>2/3||c==0)&&c<255)
{
c
d[a]=2;
}
else
{
if ((Math.random()<=1/2||c==255)&&c>0)
{
c--
d[a]=1;
}
else d[a]=0;
}
return c
}
function do_it(a,c)
{
if ((d[a]==2&&c<255)||c==0)
{
c
d[a]=2
}
else
if ((d[a]==1&&c>0)||c==255)
{
c--;
d[a]=1;
}
if (a==3)
{
if (d[1]==0&&d[2]==0&&d[3]==0)
flag=1
}
return c
}
function disco()
{
if (flag==0)
{
r=ran(1, r);
g=ran(2, g);
b=ran(3, b);
hex(1,r)
hex(2,g)
hex(3,b)
document.body.style.background="#" t[1] o[1] t[2] o[2] t

[3] o[3]
flag=50
}
else
{
r=do_it(1, r)
g=do_it(2,g)
b=do_it(3,b)
hex(1,r)
hex(2,g)
hex(3,b)
document.body.style.background="#" t[1] o[1] t[2] o[2] t

[3] o[3]
flag--
}
setTimeout('disco()',50)
}
//-->
</script>
<!--End Disco Background[http://place2how-to.blogspot.com/-->

3. Then Save it.

4. Now, go to Design > Edit HTML > Check Expand Widget Templates. Find this code <body>

5. Replace the code above with this code :
<body onload="disco()">

6. Save your template & DONE! 


Love it?  You gonna it!!


credits : Kreatifbuzz

Remove Link Underlines in Blogger


When you hyperlink to a text in blogger, the link will appear with the underlines. Maybe it's nothing for you and it's look just normal. But some blogger like to customize their blog to make it look really nice and simple. So, you wanna get rid of it?

Steps :

1.When you add a link to a text, it will has an underlines, example :


2. You can remove it by adding this code :
style="text-decoration:none"

3. It will look like this,


For the example above, I use this code :
<a href="http://place2how-to.blogspot.com/" style="text-decoration:none"> HOW-TO HOUSE</a>
4. Finish!


Note : Edit the code in the Edit HTML section.


Try it!


Wanna add tooltip to your blog? here.

How To Make Floating and Click to Appear Shoutbox in Blogger


Nowadays, blogger always want something new and fresh to express their blog. Including how the shoutbox appear. We already known the trick of hiding shoutbox on the side of the blog, but now you can use this new trick for shoutbox with CSS. This method make your shoutbox floating at the right top and click-to-appear. But to do this, you need a shoutbox. Read about How To Add Shoutbox On Your Blog


Wanna make your shoutbox just like that? Follow this steps :

1. Go to your Dashboard >> Design >> Page Element >> Add a Gadget >> HTML/Javascript.


2. Paste this code on it.

3. Change the bold code with your own detail needed.

4. Save and DONE!


You can DOWNLOAD Shoutbox icon here.

GOOD LUCK!

This how-to requested by Faezahannahalbaj

Thanks to : Kreatifbuzz

Wednesday, December 15, 2010

How To Add Post Headlines Slider in Blogger

You wanna make something different with your blog? Wanna add post headlines slider? This widget is useful to attract your visitor with your other posts. It is just like a news headlines. With this widget, your post will automatically change every second nicely. 


Interested? You can use this widget just in 3 steps. Add this Post Headlines Slider on your blog by following this 3 steps :

1. Go to your Dashboard > Design > Page Element > Add a Gadget > HTML/Javascript.

2. Put this code below, in it :
<style type="text/css">
.gfg-root {
width : 100%;
height : auto;
position : relative;
overflow : hidden;
text-align : center;
font-family: "Arial", sans-serif;
font-size: 20px;
border: 1px solid #BCCDF0;
}

.gfg-title {
font-size: 24px;
font-weight : bold;
color : #3366cc;
background-color: #E5ECF9;
line-height : 1.4em;
overflow : hidden;
white-space : nowrap;
}

.gfg-title a {
color : #3366cc;
}

.gfg-subtitle {
font-size: 18px;
font-weight : bold;
color : #3366cc;
background-color: #E5ECF9;
line-height : 1.4em;
overflow : hidden;
white-space : nowrap;
margin-bottom : 0px;
}

.gfg-subtitle a {
color : #3366cc;
display:none !important;
}

.gfg-entry {
background-color : white;
width : 100%;
height : 6.9em;
position : relative;
overflow : hidden;
text-align : left;
margin-top : 3px;
}

/* To allow correct behavior for overlay */
.gfg-root .gfg-entry .gf-result {
position : relative;
background-color : white;
width : auto;
height : 100%;
padding-left : 20px;
padding-right : 5px;
}

.gfg-list {
position : relative;
overflow : hidden;
text-align : left;
margin-bottom : 5px;
display:none !important;
}

.gfg-listentry {
line-height : 1.5em;
overflow : hidden;
white-space : nowrap;
text-overflow : ellipsis;
-o-text-overflow : ellipsis;
padding-left : 15px;
padding-right : 5px;
margin-left : 5px;
margin-right : 5px;
}

.gfg-listentry-odd {
background-color : #F6F6F6;
}

.gfg-listentry-even {
}

.gfg-listentry-highlight {
background-image : url('garrow.gif');
background-repeat: no-repeat;
background-position : center left;
}

/*
* FeedControl customizations.
*/

.gfg-root .gfg-entry .gf-result .gf-title {
font-size: 24px;
line-height : 1.2em;
overflow : hidden;
white-space : nowrap;
text-overflow : ellipsis;
-o-text-overflow : ellipsis;
margin-bottom : 2px;
}

.gfg-root .gfg-entry .gf-result .gf-snippet {
height : 3.8em;
color: #000000;
margin-top : 3px;
}

/*
* Easy way to get horizontal mode, applicable via js options to gadget.
*/

.gfg-horizontal-container {
position : relative;
}

.gfg-horizontal-root {
height : 1.5em;
_height : 100%;
position : relative;
white-space : nowrap;
overflow : hidden;
text-align : center;
font-family: "Arial", sans-serif;
font-size: 13px;
border: 1px solid #AAAAAA;
padding : 5px;
margin-right : 80px;
}

.gfg-horizontal-root .gfg-title {
font-weight : bold;
background-color: #FFFFFF;
line-height : 1.5em;
overflow : hidden;
white-space : nowrap;
float : left;
padding-left : 10px;
padding-right : 12px;
border-right: 1px solid #AAAAAA;
}

.gfg-horizontal-root .gfg-title a {
color : #444444;
text-decoration : none;
}

.gfg-horizontal-root .gfg-entry {
width : auto;
height : 1.5em;
position : relative;
overflow : hidden;
text-align : left;
margin-top : 0px;
margin-left : 0px;
padding-left : 10px;
}

/* To allow correct behavior for overlay */
.gfg-horizontal-root .gfg-entry .gf-result {
position : relative;
background-color : white;
width : 100%;
height : 100%;
line-height : 1.5em;
overflow : hidden;
white-space : nowrap;
}

.gfg-horizontal-root .gfg-list {
display : none;
}

/*
* FeedControl customizations.
*/

.gfg-horizontal-root .gfg-entry .gf-result .gf-snippet,
.gfg-horizontal-root .gfg-entry .gf-result .gf-author {
display : none;
}

.gfg-horizontal-root .gfg-entry .gf-result .gf-title {
color: #0000cc;
margin-right : 3px;
float : left;
}

.gfg-horizontal-root .gfg-entry .gf-result .gf-spacer {
float : left;
}

.gfg-horizontal-root .gfg-entry .gf-result .gf-spacer,
.gfg-horizontal-root .gfg-entry .gf-result .gf-relativePublishedDate {
display : block;
color: #AAAAAA;
}

.gfg-branding {
white-space : nowrap;
overflow : hidden;
text-align : left;
position : absolute;
right : 0px;
top : 0px;
width : 80px;
}

.gfg-collapse-open, .gfg-collapse-closed {
background-repeat : no-repeat;
background-position : center;
cursor : pointer;
float : right;
width : 17px;
height : 20px;
}

.gfg-collapse-open {
background-image : url('arrow_open.gif');
}

.gfg-collapse-closed {
background-image : url('arrow_close.gif');
}

.gfg-collapse-href {
float : left;
}

.clearFloat {
clear : both;
}
#feedGadget {
margin-top : 5px;
margin-left: auto;
margin-right: auto;
width : 500px;
font-size: 10px;
color: #9CADD0;
}
</style>
<noscript><a href="YOUR BLOG URL" target="_blank">Blogger Hacks</a></noscript>
<script src="http://www.google.com/jsapi/?key=internal-sample"
type="text/javascript"></script>
<script src="http://www.google.com/uds/solutions/dynamicfeed/gfdynamicfeedcontrol.js" type="text/javascript"></script>

<script type="text/javascript">

function showGadget() {
var feeds = [
{title:'title',
url:'YOUR BLOG URLatom.xml?redirect=false&start-index=1&max-results=999'},

];

new GFdynamicFeedControl(feeds, 'feedGadget',
{numResults : 1000, stacked : true,
title: "YOUR HEADLINES TITLE"});
}
google.load("feeds", "1");
google.setOnLoadCallback(showGadget);
</script>
<noscript><a href="YOUR BLOG URL" target="_blank">Blogger Hacks</a></noscript>
<div id="feedGadget">Loading...</div>
<div id="feedGadget">.</div>

Change :
  • YOUR BLOG URL with your Blog URL. 
  • Change the theme color by edit the bold color code. [Optional] 
  • Or you can edit any other code by figuring it out your self.

3. Save it. DONE!


Like it? Drop your comments. [Dofollow mode]

Tuesday, December 14, 2010

How To Add Top Commenters Widget in Blogger

Now you can show your blog Top commenters or you can called they King Of Commenter. With this widget, you can encourage your visitors to leave their comments. Isn't that good? It's nice.


Add this widget by follow this tutorial. Steps :

1. Go to your Dashboard > Design > Page Element > Add a Gadget > HTML/Javascript.

2. Put the code below, in it :
<script type="text/javascript">
function pipeCallback(obj) {
document.write('<ol>');
var i;
for (i = 0; i < obj.count ; i  )
{
var href = "'"   obj.value.items[i].link   "'";
var item = "<li>"   "<a href="   href   ">"   obj.value.items[i].title   "</a> </li>";
document.write(item);
}
document.write('</ol>');
}
</script>
<script src="http://pipes.yahoo.com/pipes/pipe.run?_render=json&_callback=pipeCallback&_id=918c4b96efdf63fee389f2f025085904&EntertheURL=http%3A%2F%2FYOURBLOGNAME.blogspot.com&number=10&Nametobeexcluded=YOUR NAME" type="text/javascript"></script>
<div style="width:1px;height:1px;overflow:hidden"><a href="http://place2how-to.blogspot.com/search/label/Blogger%20Tutorial">More Blogger Tips</a></div>

3. You need to change :
YOURBLOGNAME with your blog name without http://
YOUR NAME with your name which will be excluded in that widget.
number=10 Change the value of Commenter will be shown. [Optional]

4. Save and DONE!


Also, the Top Commenter will get Dofollow Backlinks. This widget is really very useful and encourage your visitors to submit maximum of their comments to be the King Of Commenter in your blog.

Monday, December 13, 2010

How To Make Text Blink in Blogger


Some site like to make their text blink. This tutorial will teach you how to make text blink. Blinking text is useful trick to tell something like Winner of the Contest, your new brands or products, or anything you wanna make it blink. So, here we go :

1. You just need this tag :
<blink>YOUR TEXT HERE.</blink>

2. Make this text blink : "HOW-TO HOUSE | Learn a useful HOW-TO here". Example :

"HOW-TO HOUSE | Learn a useful HOW-TO here"


3. Done!


p/s : This trick work perfectly in Internet Explorer and Mozilla Firefox.

Sunday, December 12, 2010

How To Embed Youtube Video in Facebook Fan Page


This tutorial will teach you how to add Youtube video in your Facebook Fan Page. Now you can add your own video, product, your favorite music band, and many more to your Facebook fan page. If you want to do so, just follow this simple hack using Static FBML.

So, let's get start :

1. Login into your Facebook Account.

2. Go to static FBML then, "Like" static FBML in Facebook.

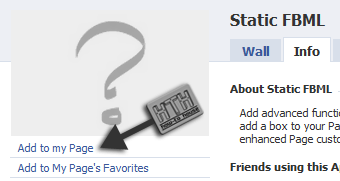
3.  Click at Add to my page.


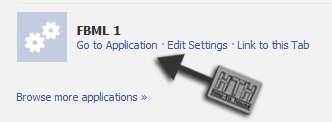
4. After you’ve added FBML application. Go “Edit Page” again > Application > FBML


5. Rename your FBML with your own desired title. And Put FBML code below, in it. [screenshot].
<fb:swf
swfbgcolor="000000" imgstyle="border-width:5px; border-color:white;" swfsrc='http://www.youtube.com/v/YOUTUBE VIDEO UNIQUE CODE&autoplay=1'
imgsrc='http://img.youtube.com/vi/YOUTUBE VIDEO UNIQUE CODE/0.jpg' width='480' height='360' />

You can customize the height and width by edit this code : width='480' height='360

Each Youtube video has a Unique Code. Don't know where to find Youtube Video Unique Code? Easy. Look screenshot below.


6. Save it. DONE!


It will looks like this,


Adding Youtube Playlist instead of single video.

You just need to change this bold code below :
<fb:swf
swfbgcolor="000000" imgstyle="border-width:5px; border-color:white;" swfsrc='http://www.youtube.com/v/YOUTUBE VIDEO UNIQUE CODE&autoplay=1'
imgsrc='http://img.youtube.com/vi/YOUTUBE VIDEO UNIQUE CODE/0.jpg' width='480' height='360' />
Change it to :
swfsrc='http://www.youtube.com/cp/YOUR PLAYLIST UNIQUE CODE'

DONE!

[?] Drop your comment for any question.

Add Related Posts Widget With Thumbnail in Blogger


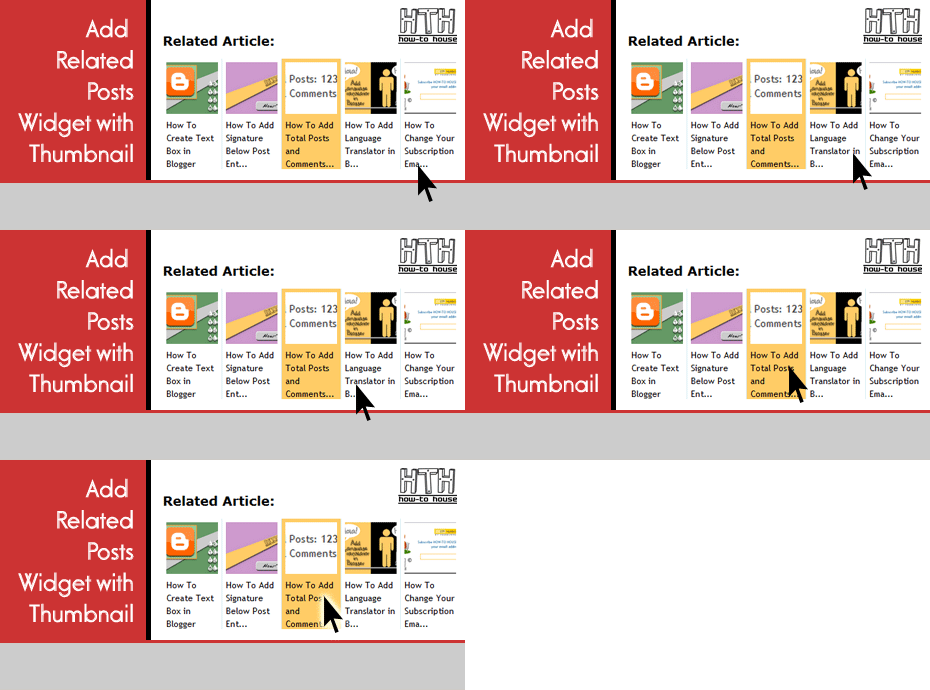
Before this, HOW-TO HOUSE give you tutorial about Related Posts Widget, and this entry is about Related widget but with thumbnail. With this widget, your related posts will appear with it's thumbnail.

It look something like LinkWithin widget, see screenshot below :


Steps :
1. Go to your Dashboard > Design > Edit HTML > Check Expand Widget Templates. 

2. Find this code </head> 

3. Paste this code below, above </head> 
<b:if align='right' cond='data:blog.pageType == &quot;item&quot;'>
<style type='text/css'>
#related-posts {
float:center;
text-transform:none;
height:100%;
min-height:100%;
padding-top:5px;
padding-left:5px;
}
#related-posts h2{
font-size: 1.6em;
font-weight: bold;
color: black;
font-family: Georgia, &#8220;Times New Roman&#8221;, Times, serif;
margin-bottom: 0.75em;
margin-top: 0em;
padding-top: 0em;
}
#related-posts a{
color:black;
}
#related-posts a:hover{
color:black;
}
#related-posts a:hover {
background-color:#dddddd;
}
</style>
<script src='http://howtohouse.googlecode.com/files/relatedpostthumbs.js' type='text/javascript'/>
</b:if>

4. Then, find this code :

<data:post.body/>
or,
<div class='post-footer-line post-footer-line-1'>  
or this,  
<p class='post-footer-line post-footer-line-1'> 


6. Save your template. DONE!

Customization : 

1. Adjust the maximum number of related posts being displayed. Edit the value on the code below. Change '12' to any value you desired.

var maxresults=12;


2. Edit the title of the widget by change this line of code :
var relatedpoststitle="Related Posts"

ENJOY!

Add Related Posts Widget in Blogger


In the previous entry, we had a tutorial to add Related Post Widget using LinkWithin, here. Now, if you want more stylish and look simple but professional, you can try to use this widget. This related articles will choose your other posts  from same category or labels. With this widget, your readers will remain in your blog as they wanted to read your other posts.

Let's start :

Note : Before make any changes, backup your  templates.

1. Go to your Dashboard > Design > Edit HTML > Check Expand Widget Templates.

2. Find this code </head> 

3. Put this code below, above </head>
<style> #related-posts { float : left; width : 480px; margin-top:20px; margin-left : 5px; margin-bottom:20px; font : 11px Verdana; margin-bottom:10px; } #related-posts .widget { list-style-type : none; margin : 5px 0 5px 0; padding : 0; } #related-posts .widget h2, #related-posts h2 { font-size : 20px; font-weight : normal; margin : 5px 7px 0; padding : 0 0 5px; } #related-posts a { text-decoration : none; } #related-posts a:hover { text-decoration : none; } #related-posts ul { border : medium none; margin : 10px; padding : 0; } #related-posts ul li { display : block; background : url("https://sites.google.com/site/howtohouse/tools/howtohousefavicon-3.ico") no-repeat 0 0; margin : 0; padding-top : 0; padding-right : 0; padding-bottom : 1px; padding-left : 21px; margin-bottom : 5px; line-height : 2em; border-bottom:1px dotted #cccccc; } </style> <script src='https://sites.google.com/site/howtohouse/hth-scripts/howtohouse-RelatedPost.js' type='text/javascript'/>

4. Now, find this code <data:post.body/> . If you can't find it, find this code <div class='post-body>

5. Put this code below, under it :
<b:if cond='data:blog.pageType == "item"'>
<div id="related-posts">
<font face='Arial' size='3'><b>Related Posts : </b></font><font color='#FFFFFF'><b:loop values='data:post.labels' var='label'><data:label.name/><b:if cond='data:label.isLast != &quot;true&quot;'>,</b:if><b:if cond='data:blog.pageType == &quot;item&quot;'>
<script expr:src='&quot;/feeds/posts/default/-/&quot;   data:label.name   &quot;?alt=json-in-script&amp;callback=related_results_labels&amp;max-results=5&quot;' type='text/javascript'/></b:if></b:loop> </font>
<script type='text/javascript'> removeRelatedDuplicates(); printRelatedLabels();
</script>
</div></b:if>

8. Save and DONE!


Customization :

You can change the number of maximum related posts being dispalyed for each label.  Find this code max-results=5, changee '5' to your desired related post value.


source : WidgetForFree

Saturday, December 11, 2010

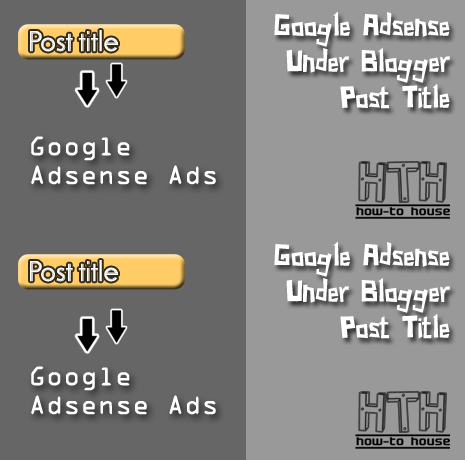
How To Put Google Adsense Under Post Title in Blogger


Many website including Pro site which had a Google Adsense ads place their code under Post title. You wanna do so? It's easy. Follow this steps :

1. Go to your Dashboard > Edit HTML > Check Expand Widget Templates.

2. Find this code :
<data:post.body/>

3.  Paste this code above it :
&lt;b:if cond=&#39;data:blog.pageType == &amp;quot;item&amp;quot;&#39;&gt;
PUT YOUR PARSED ADSENSE CODE HERE
&lt;/b:if&gt;

4. But, you need to parse your Google Adsense code. You can use this parser called "Postable" by Elliot Swan. 

Parse your Adsense Code HERE


5. Save your template. DONE!

Friday, December 10, 2010

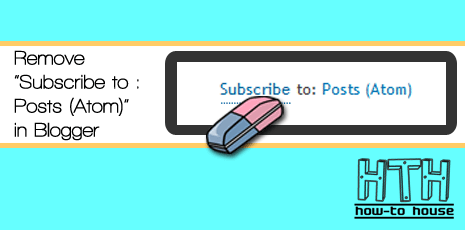
How To Remove "Subscribe to: Posts (Atom)" in Blogger


Want to get rid from Subscribe to: Posts (Atom) link at the bottom of your post entry? You can remove it by follow this step. Only 3 steps :

1. As usual, go to your Dashboard > Design > Edit HTML > Check Expand your Widget Templates.

2. Find this code, and delete it :
<b:include data='feedLinks' name='feedLinksBody'/>

3. Save your template. DONE!


GOOD LUCK! :D

Thursday, December 9, 2010

How To Create Text Box in Blogger


Do you want to add text box in blogger? Do you mean like this one?


You can use this code. Just follow this steps. Simple and easy.

Text Box without "Select All" hack.

Use this code :
<textarea rows="5" cols="40" onclick=%u201Djavascript:select()readonly;%u201D>
TEXT
</textarea>


* Change Rows and Cols/column as you like.


Text Box with "Select All" hack.

When you hover your cursor in the text box, it will automatically "Select All" the text in that text box. Use this code :
<form>
<textarea rows="5" cols="40" onClick=select() readonly>This is some text.</textarea>


* Change Rows and Cols/column as you like.


NOTE : To apply this hack, you need to edit it on Edit HTML section not Compose.


DONE! 


Good Luck! :)


Followers

Sponsor

 
Powered by Blogger.