Saturday, April 16, 2011

How To Scan Your Site or Blog From Any Virus


Are you worried about your site or blog health? If your site has a virus, people will scare to visit your site or blog and as a result your site traffic will drop! So, to check your site health and delete any virus or malicious software from your site, you can follow this method.

There are 3 free website scanning online you can use to check whether your blog infected by malicious software. Let's start check your site health.

1 - Google tools :
1. Google will gives you report about your site’s health immediately. Follow this link to check your site...
http://www.google.com/safebrowsing/diagnostic?site=http://yoursite.com

2. Change yoursite.com with your site name,

http://www.google.com/safebrowsing/diagnostic?site=http://www.place2how-to.com/

3. Then, copy and paste it to your browser and hit Enter. You will get a result from Google. [screenshot].


2 - AVG Online Web Page Scanner : 
1. The AVG LinkScanner Drop Zone lets you check the safety of individual web pages you are about to visit or your own web site.

2. Just  insert your website URL, then hit Scan button.


3 - Dr.WEB scanner :
1. Another method to scan your site. Using Dr.WEB scanner.
 
2. By simply paste your blog URL and click Scan, it will scan your site immediately.


Hope this HOW-TO help you to protect your website or blog from any virus attack or malicious software. 

ENJOY!

Wednesday, April 6, 2011

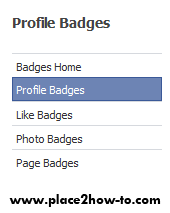
How To Add Facebook Profile Badges into Your Blog

Almost everyone has a Facebook account, including bloggers. If you want to know and be friends with your readers, put your Facebook profile badge is a right step. Do you want to add your Facebook profile badge into your blog? Follow these simple steps :


Steps :
1. Login into your facebook account.

2. On the profile page on the left side under your friends list, search for "Add a Badge to Your Site" or just click here.

3. It will take you to Facebook badges option.


4. Then, edit your badge by click 'Edit This Badge'.

5. Once you done editing, just click your blog platform icon to install it into your blog whether Blogger, Typepad or click Other to copy the code manually and paste it into HTML/JavaScript.

6. Just save it & DONE.


Now you can have more friends from your blog readers. Enjoy!

Tuesday, February 15, 2011

Add Speech Bubbles Tooltip in Blogger

What is Speech Bubbles Tooltip?

Description : Speech Bubbles Tooltip lets you add tooltips to links using either the value of the link's title attribute, or rich HTML defined all inside a single HTML file and fetched using Ajax instead.


Now, let's add it to your blog.

Steps :
1. Go to your Dashboard >> Design >> Edit HTML >> Check Expand Widget Templates.

2. Search this code (Ctrl + F), </head>

3. Copy and paste this just CODE above </head> tag.

4. Save your template.

5. To Apply the Speech Bubbles Tooltip you need to add title="YOUR DESCRIPTION" class="addspeech" on each link you want the tooltip to show up. Example :
<a title="YOUR DESCRIPTION" class="addspeech" href=http://www.place2how-to.com>HOW-TO HOUSE</a>

Yeah! It's DONE! Like it? You gonna like it!

You also can add this style of tooltip.


source : dynamicdrive

Sunday, February 13, 2011

Change Newer Posts and Older Posts with Post Titles like Worpress

Do you want to change your Newer Posts and Older Posts with your Post titles? We always see this trick only in wordpress blogs. But now, you can apply it into your blog. It also can attract more reader because they can stop to see your post title. Let's try it. Just in 3 steps.


Example : After apply the hack code

Steps :
1. Go to your Dashboard >> Design >> Page Element >> Add a Gadget.


2. Paste this code below in it.

3. Save & DONE!


Refresh your blog to see the result.

Friday, February 11, 2011

How To Change Blogger Comment Box Width and Height

Do you want to change the width and height of blogger comment box to make it look nice and fit your post page width. You only need to modify this code.

1. Go to your Dashboard >> Design >> Edit HTML >> Check Expand Widget Templates.

2. Search this code (Ctrl + F), or similar something :
<iframe allowtransparency='true' class='blogger-iframe-colorize blogger-comment-from-post' frameborder='0' height='410' id='comment-editor' name='comment-editor' src='' width='100%'/>

3. Change the bold code :

height='?' >> to any number you want.

Change it from width='100%' to any value you want but not with % anymore. Change it to px. Example : width='500px'


Example :
<iframe allowtransparency='true' class='blogger-iframe-colorize blogger-comment-from-post' frameborder='0' height='410' id='comment-editor' name='comment-editor' src='' width='500px'/>

4. Save your template & DONE!

This is a simple trick! Have a try guys. GOOD LUCK!


Followers

Sponsor

 
Powered by Blogger.