Friday, December 30, 2011

How To Create Spinning Popular Post Widget in Blogger

Yes. It is very nice effect to have to your Popular Post widget. Whwn you hover your cursor to the Post, the image will zooming anda spinning. You can have it by follow this steps.


SEE DEMO

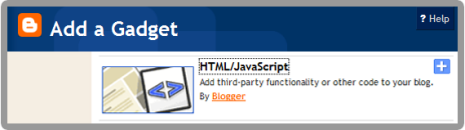
1. Go to Dashboard ->> Design ->> Edit HTML

2.
Search this code (Ctrl + F), ]]></b:skin>

3. Copy below code and paste it just after
]]></b:skin> tag,
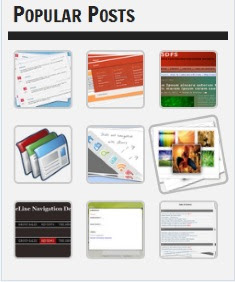
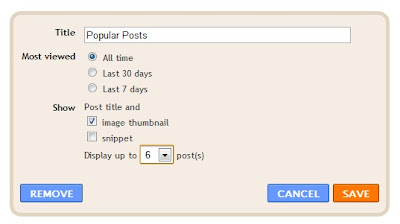
<style type='text/css'>
.PopularPosts ul li {background: none repeat scroll 0 0 transparent;float: left;list-style: none outside none;margin: 5px !important;padding: 0 !important;}
.PopularPosts ul li img {padding:0;-moz-border-radius: 5px;-webkit-border-radius: 5px;border-radius: 5px;-webkit-transition: all 0.3s ease;-moz-transition: all 0.3s ease;transition: all 0.3s ease;border: 2px solid #CCC;height: 80px;width: 80px;}
.PopularPosts ul li img:hover {border:2px solid #BBB;-moz-transform: scale(1.2) rotate(-1090deg) ;-webkit-transform: scale(1.2) rotate(-1090deg) ;-o-transform: scale(1.2) rotate(-1090deg) ;-ms-transform: scale(1.2) rotate(-1090deg) ;transform: scale(1.2) rotate(-1090deg) ;}
</style>
Note: Make sure you add Popular Posts widget to your blogger sidebar. 

4. Now save your template,

5. Edit your Popular Posts widget setting into something like this...


6. Save it.


Refresh your blog to see the result. Cool huh? Good job!


Leave your comment!

Monday, December 26, 2011

How To Create Google Plus Fan Page For Blogger

Google Plus has launch a Google Plus Fan Page. It's similar to Facebook Fan Page. You can use Google Plus Fan Page for business to promote your products, events, etc. This is how to create and add it into your blog.

Create Google + Fan Page
1. First, go to this page, click on the Product or Brand.

2. Enter the Blog Title and URL, select Category

3. Tick the Agree Page Terms check-box and Click on Create Button.

4. Enter the Tagline and Upload a Profile photo.

6. You're page is almost done, click the Share on Google+ button and Finally Click the Finish button.


Add Fan Page Badge to your Blog
Grow your fans or follower by adding this badge to your blog.

1. Go to Get Started page, click the get the Badge link.

2. Choose a Style of Badge and Language (Leave the Advanced options to Default).


3. There is 2 code to add into your blog.
4. Go to Blogger Dashboard > Design > Edit HTML
5. Search for the </head> tag, add the Code #1 section before it.
6. Save your template.
7. Then, add the Code2 section in HTML/JavaScript gadget and place where you want the badge to be appear.

Finish. That's it! Enjoy! Leave your comment yeah!

Saturday, December 10, 2011

How To Change Linkwithin "You might also like" Message in Blooger

Do you have Linkwithin Related post widget? You want to change the Linkwithin message to another message? Sure you can. Only add some code into it. Let's know how.


Add the red code, above your Linkwithin code:
<script>linkwithin_text='YOUR NEW LINKWITHIN MESSAGE :'</script>
YOUR LINKWITHIN CODE

Yeah, that's all you need. Refresh to see the result.

Hope you like it.

Thursday, November 10, 2011

How To Add Scroll For Blog Archive in Blogger

Salam.

Your blog archive is too damn long to the bottom? Do you wanna add a scroll to your blog? Yes, you just to do this few steps to make your blog archive looks like this.


STEPS:
1. Go to your Dashboard >> Design >> Edit HTML >> Check Expand Widget Templates.

2. Search this code (Ctrl + F), ]]></b:skin>

3. Put this code below, after ]]></b:skin>
#BlogArchive1 .widget-content{
height:300px;
width:auto;
overflow:auto;
}

4. You can change the scroll height by edit the code in red:

5. Save. Refresh to see the result.


+ For more tutorial, just see through the labels.

Tuesday, October 25, 2011

How To Make Facebook Like Box Like Wordpress

Wanna have Facebook Like Box like this? Just like in Wordpress. Watch DEMO [click]


You only need to follow this few steps. Let's start.

INSTRUCTION:
1. Go to your Dashboard >> Design >> Page Element >> Add a Gadget.


2. Paste this code in.
<center>
<iframe frameborder="0" href="%0A%0AYOUR FAN PAGE URL%0A%0A" scrolling="no" src="http://www.facebook.com/plugins/fan.php?id=%0A%YOUR FAN PAGE ID%0A%0A&amp;width=292&amp;height=250&amp;connections=25&amp;stream=false&amp;header=false&amp;logobar=false&amp;css=http://howtohouse.googlecode.com/files/fblike.css" style="height: 230px; width: 85%;"></iframe>
<iframe allowtransparency="true" frameborder="0" scrolling="no" src="http://www.facebook.com/plugins/like.php?href=%0A%0AYOUR FAN PAGE URL%0A%0A&amp;send=false&amp;layout=standard&amp;width=292&amp;show_faces=false&amp;action=like&amp;colorscheme=light&amp;font&amp;height=40" style="border: none; height: 40px; overflow: hidden; width: 250px;"></iframe></center>
3. Change:
YOUR FAN PAGE URL- Where to find? Just go to your fan page. Copy URL in the URL bar.


YOUR FAN PAGE ID - On your fan page, click on the Edit Info and copy the ID from the URL bar.


4. Save and FINISH!

Do you like it? ENJOY!


Followers

Sponsor

 
Powered by Blogger.