Tuesday, November 30, 2010

How To Add Post Divider In Blogger

Wanna customize your post divider with more style ? HOW-TO HOUSE also customize the post divider. So, you can change it to your own page divider image or search an image at search engine, keyword  "post divider".

HOW-TO HOUSE post divider

Now, change yours. Follow this simple steps :

1. Find this code :
.post
2.  Change it with this code :
.post{
margin: 0 0 40px 0;
width: 100%;
background: url(YOUR POST DIVIDER IMAGE URL);
background-repeat: no-repeat;
background-position: bottom center;
margin:.5em 0 1.5em;
padding-bottom:2.5em;
}

3. Change the bold code with your post divider image URL.

4. Save your template. DONE!


NOTE : You can search a "post divider"  by search it on the Google Search Image Engine, keyword "Post Divider". Or you can design your own "post divider" and host it.


More blogger tutorial here.

Saturday, November 27, 2010

How To Fix Google and Yahoo Redirect Problem

Can't search with Google or Yahoo! search engine? Your browser keep redirect you to other site? Such as below screenshot. 


This is a how to remove Google or Yahoo! redirects. If you are searching something on Google or Yahoo! search engine and keep you get the wrong page, this is just right for you. Follow this super simple trick steps : 
  • Go to Local Disk C:\Windows\System32\drivers\etc
  • In etc folder, delete file named "hosts"
  • Delete it.
  • Finish! You can search with Google or Yahoo! search engine.


Have Fun Browsing! :D


Don't forget to subscribe to get an Updates from HOW-TO HOUSE on your inbox.


Delivered by FeedBurner
You can ask for more tricks here.

Don't forget to drop your comment.

Any Question or Suggestions? Join our forum at HOW-TO HOUSE Forum.

Friday, November 12, 2010

How To Add a Reply Button To Blogger Comments


Many websites has this comfort of replying for the comments they get, where the replies go right behind the one you are replying. In blogger this facility was not there with the default templates and even with some custom templates.  If you want to add reply button, follow these steps.

Steps :
  • Layout >> Edit Html >> Expand widgets,  search for the code given below,
    <data:commentPostedByMsg/>
  • Replace it with the code with below,
    <data:commentPostedByMsg/>
    <span><a expr:href='&quot;https://www.blogger.com/comment.g?blogID=YOUR-BLOG-ID&amp;postID=&quot;   data:post.id   &quot;&amp;isPopup=true&amp;postBody=%40%3C%61%20%68%72%65%66%3D%22%23&quot;   data:comment.anchorName   &quot;%22%3E&quot;   data:comment.author   &quot;%3C%2F%61%3E#form&quot;' onclick='javascript:window.open(this.href, &quot;bloggerPopup&quot;, &quot;toolbar=0,location=0,statusbar=1,menubar=0,scrollbars=yes,width=450,height=450&quot;); return false;'>[Reply]</a></span>
  • Replace the red one indicating blog id with your ID. Find it your blog ID by, go to Dashboard > Design > Look for the BLOG ID at the URL address

Change the 'Reply text' with an image, paste this code below this code <data:commentPostedByMsg/>
<data:commentPostedByMsg/>
<span><a expr:href='&quot;https://www.blogger.com/comment.g?blogID=YOUR-BLOG-ID&amp;postID=&quot;   data:post.id   &quot;&amp;isPopup=true&amp;postBody=%40%3C%61%20%68%72%65%66%3D%22%23&quot;   data:comment.anchorName   &quot;%22%3E&quot;   data:comment.author   &quot;%3C%2F%61%3E#form&quot;' onclick='javascript:window.open(this.href, &quot;bloggerPopup&quot;, &quot;toolbar=0,location=0,statusbar=1,menubar=0,scrollbars=yes,width=450,height=450&quot;); return false;'><img src=" https://blogger.googleusercontent.com/img/b/R29vZ2xl/AVvXsEibcP9Jo564bY8zM4lfsB5S7kIlJnN6JEyqHRw0Df235mUUFKwlzZNggfcXybCOVV0fes-5l2JgxGXIBYnaRPAhcixYIQgfifz8W302wVZQxInanzeHYZGyVoSs7IhIZoeZdOGY_OqUmOwj/"/></a></span>
Or you can change it to another image. Just replace https://blogger.googleusercontent.com/img/b/R29vZ2xl/AVvXsEibcP9Jo564bY8zM4lfsB5S7kIlJnN6JEyqHRw0Df235mUUFKwlzZNggfcXybCOVV0fes-5l2JgxGXIBYnaRPAhcixYIQgfifz8W302wVZQxInanzeHYZGyVoSs7IhIZoeZdOGY_OqUmOwj/ with your reply icon image URL.


DONE!!


Any Question or Suggestions? Join our forum at HOW-TO HOUSE Forum.

    Thursday, November 4, 2010

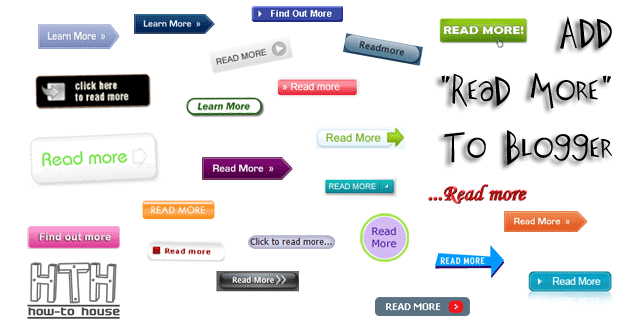
    How To Add "Read More" To Blogger


    If you use customize blogger template other than default blogger template, sometime there is no "Read More" option. So, let's follow this how-to.
    Let's start. Steps :
    • Go to your blogger Dashboard > Design > Edit HTML.
    • Check " Expand Widget Template .
    • Find the code below :
      <data:post.body/> or <p><data:post.body/></p>
    • Put the code below, exactly above code it :
      <b:if cond='data:blog.pageType == "item"'>
      <style>.fullpost{display:inline;}</style>
      <p><data:post.body/></p>
      <b:else/>
      <style>.fullpost{display:none;}</style>
    •  Then, search for this code :
      <data:post.body/>/font> or <p><data:post.body/></p>
    • Put this code,  after it.
      <b:if cond='data:blog.pageType != "item"'><br />
      <a expr:href='data:post.url'>Read more...</a>
      </b:if>
      </b:if>
    • Next, you need to go to Dashboard > Settings > Formatting.
    • Go to Post Template area. Put this code into it.
      Post Before %u201Cread more%u201D
      <span class="fullpost">
      And here is the rest of it
      </span>
    • Click SAVE TEMPLATE button.
    • DONE!

    Customize "Read More" with image :
    1. Find this code or something like this :
    <b:if cond='data:post.hasJumpLink'>
    <div class='jump-link'>
    <a expr:href='data:post.url   "#more"'>Read More </a>
    </div>
    </b:if >

    2. Change :
    <a expr:href='data:post.url   "#more"'>Read More</a>

    to
    <a expr:href='data:post.url   "#more"'><img border="0" src="Paste your READ MORE Image URL here"/></a>

    3. To align it, just add this code <p align="xxxx"> :
    Example :
    <a expr:href='data:post.url   "#more"'><p align="Left">Read More</p></a>

    or
    <a expr:href='data:post.url   "#more"'><p align="right"><img border="0" src="Your READ MORE Image URL "/></p></a>

    4. DONE!

    Other method : How to use "Read More" :
    • Click on the page break icon to use "Read More". (screenshot)

      HTH,how-to house,read more


    To Change "Read More >>" to other word you want :
    • Go to Page Elements tab.
    • Click "Edit" on "Blog posts" Element. Change "Read More".


    • SAVE and DONE!


    Source : Allblogtools


    Share or recommend  this article to your friends!

    How To Remove Your Blogger Navbar

    Do you want your blog looks more professional without blogger Navigation bar or so called Navbar?

    This is Blogger Nagivation Bar.

    You can remove it. It's easy. Follow these steps :

    :: Steps To Remove Navbar :
    • Go to Dashboard > Edit HTML.
    • Tick on Expand Widget Templates.
    • Find this code (press ctrl + F)
      ]]>
    •  Then put this code above it.
      #navbar { display: none; }
    • Preview your blog. If no more Navbar, it's done! :D

    :: How to get the Navbar back?
    • Go to Dashboard > Edit HTML.
    • Tick on Expand Widget Templates.
    • Simply find this code (press ctrl + F),
      #navbar { display: none; }
    •  And delete it.
    • You can get your Navbar back.
    • Done!

    SiMPLE and EASY


    Don't forget to subscribe to get an Updates from HOW-TO HOUSE on your inbox.


    Delivered by FeedBurner
    You can ask for more tricks here.

    Don't forget to drop your comment.

    Any Question or Suggestions? Join our forum at HOW-TO HOUSE Forum.

    Wednesday, November 3, 2010

    How To Add Shoutbox On Your Blog

    Shoutbox is important for your to let your visitor chat with blog owner or other visitor. With shoutbox, you also can visit your visitor back by hit their URL. So, let's start how to add Shoutbox to your blog.
    Many bloggers use ShoutMix because it have nice design of Shoutbox. If you not any account on ShoutMix, just SignUp here : Shoutmix
    • Login to your shoutbox control panel and select Use shoutbox
    • Select Place shoutbox on a webpage and customize the settings to your preference.
    • Copy the generated codes. 

    How-To :
    • Go to Blogger.com. Login to your account and click Layout.
    • Click Add a Page Element > HTML/JavaScript.
    • Paste the generated shoutbox codes under Content. SAVE CHANGES. 
    • You can also move your shoutbox and reposition it by drop it anywhere you want.
    • Done! You have your own shoutbox.
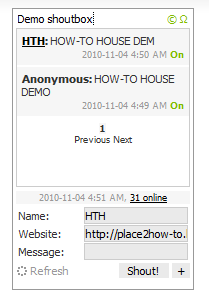
     [shoutmix screenshot]
    HTH demo,how-to house,shoutmix,chatbox

    Actually, there is another shoutbox which also popular among the bloggers. It's Cbox. You can try it if you not interested with Shoutmix.

    HAVE FUN!

    Don't forget to subscribe to get an Updates from HOW-TO HOUSE on your inbox.


    Delivered by FeedBurner
    You can ask for more tricks here.

    Don't forget to drop your comment.

    Any Question or Suggestions? Join our forum at HOW-TO HOUSE Forum.


    Followers

    Sponsor

     
    Powered by Blogger.