Showing posts with label Blogger Hack. Show all posts

Monday, November 26, 2012

Scan URL wether it is safe or not

Some of URL link in the internet are not safe because of viruses, worms, malware or anything, you name it. Before you are stuck with an insecure link, it's better scan before clicking on the link URL. You can scan these suspicious links before you click on them. 

URLVoid 
URLVoid is a free link service to scan any suspicious URL. Just go to the website, and paste your URL there, and it will tell you whether it is safe or not.


Stay calm & happy browsing! :)

Sunday, January 22, 2012

How To Integrate Facebook Comment Box in Blogger

Recently Facebook has launched many social plugins and web developers for bloggers. Their much improved Facebook comment box. Facebook comment box is one of the useful tool for bloggers to increase conversations. So, if you interested to integrate Facebook comment box on your blog and change blogger comment into Facebook comment box? This entry is just exact for you. Let's do it.

Note : Before make any changes, back up your template.

1. Visit Facebook Developer Page. Enter your blog name, URL and click on Create application.


2. After that, copy the APP ID.


3. Then, go to Edit Setting


4. If you using blogspot, follow below instruction,


5. But if you using other domain like .com, follow instruction below,


6. Save your App.


ADD FACEBOOK COMMENT BOX

1. Go To Blogger >> Design ->> Edit HTML

2. Check the "Expand Widget Templates" box


3. Search for <html and just after it add this code,

xmlns:fb='http://www.facebook.com/2008/fbml'

4. Now search (Ctrl+F) for,
<body>

5. Just after it, add the below code,
<div id='fb-root'/>
<script>
    window.fbAsyncInit = function() {
    FB.init({
      appId  : &#39;YOUR_APP_ID&#39;,
      status : true, // check login status
        cookie : true, // enable cookies to allow the server to access the   session
      xfbml  : true  // parse XFBML
    });
  };
    (function() {
    var e = document.createElement(&#39;script&#39;);
      e.src = document.location.protocol     &#39;//connect.facebook.net/en_US/all.js&#39;;
    e.async = true;
      document.getElementById(&#39;fb-root&#39;).appendChild(e);
    }());
</script>

6. Change YOUR_APP_ID with your App ID number.

7. And then, search (Ctrl+F) </head> and just above it paste the below code,
<meta expr:content='data:blog.pageTitle' property='og:title'/>
<meta expr:content='data:blog.url' property='og:url'/>
<meta content='YOUR BLOG NAME' property='og:site_name'/>
<meta content='BLOG-LOGO-IMAGE-LINK' property='og:image'/>
<meta content='YOUR_APP_ID' property='fb:app_id'/>
<meta content='http://www.facebook.com/YOUR _FACEBOOK_USERNAME' property='fb:admins'/>
<meta content='article' property='og:type'/>

Replace the red code with your details.

8. Now, search (Ctrl+F) for this ;
<b:includable id='comment-form' var='post'>

9. After it paste the code given below,
<b:if cond='data:blog.pageType == &quot;item&quot;'>
<div style='padding:0px 0px 0px 0px; margin:0px 0px 0px 0px;'><script src='http://connect.facebook.net/en_US/all.js#xfbml=1'/>
<div> <fb:comments  colorscheme='light' expr:href='data:post.url' expr:title='data:post.title' expr:xid='data:post.id' width='520'/></div>
</div>
</b:if>

If you want to use the dark scheme replace light with dark

To change the comments box width, change this value width='520'

#UPDATE
10. Search (Ctrl+F) <fb:comments

11. Replace it with,
<script src='http://connect.facebook.net/en_US/all.js#xfbml=1'/> <fb:comments migrated='1'
12. Save your template.


HIDE BLOGGER COMMENT

Now you need to hide default blogger commenting system. So navigate to Settings > Comments and select hide and save settings.


DONE! See the result.

With this, your previous blogger comment will be hidden.


Do you like it? Recommend it!

Saturday, January 21, 2012

How To Enable Threaded Comment in Blogger Custom Template

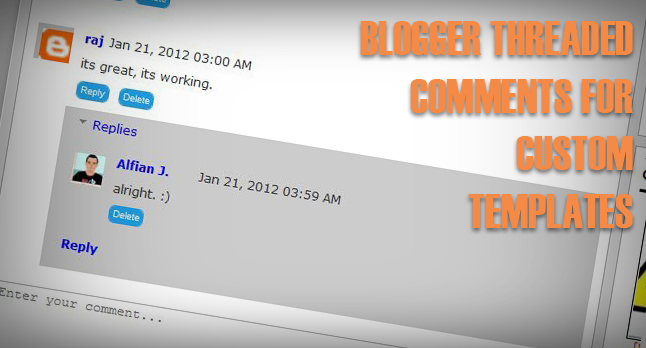
Recently, blogger had update new feature which is threaded comment. If you use template from blogger you will see your blogger comment in threaded style. So, if you want to add threaded comment in costume template, just follow this instruction.


APPLY THREADED COMMENT IN COSTUME TEMPLATE
1. Go to Dashboard ->> Layout ->> Edit HTML

2. Search this code (Ctrl + F),
<b:if cond='data:blog.pageType == &quot;item&quot;'>
  <b:include data='post' name='comments'/>
</b:if> 
#maybe this code will appear twice.

3.Replace it with this code,
<b:if cond='data:blog.pageType == &quot;static_page&quot;'>
<b:if cond='data:post.showThreadedComments'>
<b:include data='post' name='threaded_comments'/>
<b:else/>
<b:include data='post' name='comments'/>
</b:if>
</b:if>
<b:if cond='data:blog.pageType == &quot;item&quot;'>
<b:if cond='data:post.showThreadedComments'>
<b:include data='post' name='threaded_comments'/>
<b:else/>
<b:include data='post' name='comments'/>
</b:if>
</b:if>
#so replace the provided code twice.

4. Customize your threaded comment, search (Ctrl+F) this tag,

<b:includable id='threaded_comment_css'>
.
.
.
.
until </b:includable>

6. And then replace it with  this CSS [click].

7. Save your template. Refresh your blog to see the result.

Any problem, just leave your comment. :)

Thursday, January 19, 2012

How To Add jQuery Scroll To Top Widget in Blogger

This widget is made your visitor to easier scroll to top of the page by click on it. It's nice and smooth. It only show up when you scroll the page. I also put this widget in HOW-TO HOUSE. So, let's add it now.

Add the Scroll to top jQuery script

1. Go to Dashboard ->> Design ->>; Edit HTML

2. Search this code (Ctrl + F), </head>

3. Then, paste the code below after </head>
<script src='https://ajax.googleapis.com/ajax/libs/jquery/1.6.1/jquery.min.js' type='text/javascript'/>
<style type='text/css'>#w2btoTop {display:none;text-decoration:none;position:fixed;bottom:10px;right:10px;overflow:hidden;width:51px;height:51px;border:none;text-indent:-999px;background:url(https://blogger.googleusercontent.com/img/b/R29vZ2xl/AVvXsEiA3kSYAOIhjCyyLUPiKjRDS5S5Up39GbMICwRQLwYDV1GYJUGXkdQXQrXloh7_dZFxBNA4g7zqSiHEiqZyDBs7RBySjWbfpL1h6lMDrTJRLEx9RvM86uB9u803uE_MYjfDQAGNTLnM-c03/) no-repeat left top;}#w2btoTopHover {background:url(https://blogger.googleusercontent.com/img/b/R29vZ2xl/AVvXsEiA3kSYAOIhjCyyLUPiKjRDS5S5Up39GbMICwRQLwYDV1GYJUGXkdQXQrXloh7_dZFxBNA4g7zqSiHEiqZyDBs7RBySjWbfpL1h6lMDrTJRLEx9RvM86uB9u803uE_MYjfDQAGNTLnM-c03/) no-repeat left -51px;width:51px;height:51px;display:block;overflow:hidden;float:left;opacity: 0;-moz-opacity: 0;filter:alpha(opacity=0);}#w2btoTop:active, #w2btoTop:focus {outline:none;}</style><script src='http://bloggerblogwidgets.googlecode.com/files/w2b_jquery.ui.totop.js' type='text/javascript'/><script type='text/javascript'>$(document).ready(function(){ $().UItoTop({ easingType: &#39;easeOutCubic&#39; }); }); </script> 

4. Save your template.

Refresh your blog to see the result. Finish!

Friday, December 30, 2011

How To Add Flash Animated Label Tags Cloud in Blogger


Blogger has a Labels tag widget to show your category of entries. This hack will show your labels tag in flash animated. Displaying animated cloud is a cool way of showing your tags in a limited space. Let's do it!

1. Go to Dashboard ->> Design ->> Edit HTML

2. Search this code (Ctrl + F),
<b:section class='sidebar' id='sidebar' preferred='yes'> 

3. Then, paste the code below after <b:section class='sidebar' id='sidebar' preferred='yes'> tag.
 <b:widget id='Label99' locked='false' title='Labels' type='Label'><b:includable id='main'><b:if cond='data:title'><h2><data:title/></h2></b:if><div class='widget-content'><script src='http://halotemplates.s3.amazonaws.com/wp-cumulus-example/swfobject.js' type='text/javascript'/><div id='flashcontent'></div><script type='text/javascript'>var so = new SWFObject(&quot;http://halotemplates.s3.amazonaws.com/wp-cumulus-example/tagcloud.swf&quot;, &quot;tagcloud&quot;, &quot;240&quot;, &quot;300&quot;, &quot;7&quot;, &quot;#ffffff&quot;);// uncomment next line to enable transparency//so.addParam(&quot;wmode&quot;, &quot;transparent&quot;);so.addVariable(&quot;tcolor&quot;, &quot;0x333333&quot;);so.addVariable(&quot;mode&quot;, &quot;tags&quot;);so.addVariable(&quot;distr&quot;, &quot;true&quot;);so.addVariable(&quot;tspeed&quot;, &quot;100&quot;);so.addVariable(&quot;tagcloud&quot;, &quot;<tags><b:loop values='data:labels' var='label'><a expr:href='data:label.url' style='12'><data:label.name/></a></b:loop></tags>&quot;);so.addParam(&quot;allowScriptAccess&quot;, &quot;always&quot;);so.write(&quot;flashcontent&quot;);</script><b:include name='quickedit'/></div></b:includable></b:widget>

4. Save your template.

Refresh your blog to see the result. Finish!

Leave your comment friends! :)

How To Stop Google Photo Indexing in Blogger

You can easily prevent Google from indexing  photo from your blog by doing below steps. Let's know how.

1. Go to Dashboard ->> Layout ->> Edit HTML

2.
Search this code (Ctrl + F), <head>

3. Copy below code and paste it after the
<head> tag .

<meta content='noimageindex' name='robots'/>

4. Save template. Finish.

Yeah!

How To Create Spinning Popular Post Widget in Blogger

Yes. It is very nice effect to have to your Popular Post widget. Whwn you hover your cursor to the Post, the image will zooming anda spinning. You can have it by follow this steps.


SEE DEMO

1. Go to Dashboard ->> Design ->> Edit HTML

2.
Search this code (Ctrl + F), ]]></b:skin>

3. Copy below code and paste it just after
]]></b:skin> tag,
<style type='text/css'>
.PopularPosts ul li {background: none repeat scroll 0 0 transparent;float: left;list-style: none outside none;margin: 5px !important;padding: 0 !important;}
.PopularPosts ul li img {padding:0;-moz-border-radius: 5px;-webkit-border-radius: 5px;border-radius: 5px;-webkit-transition: all 0.3s ease;-moz-transition: all 0.3s ease;transition: all 0.3s ease;border: 2px solid #CCC;height: 80px;width: 80px;}
.PopularPosts ul li img:hover {border:2px solid #BBB;-moz-transform: scale(1.2) rotate(-1090deg) ;-webkit-transform: scale(1.2) rotate(-1090deg) ;-o-transform: scale(1.2) rotate(-1090deg) ;-ms-transform: scale(1.2) rotate(-1090deg) ;transform: scale(1.2) rotate(-1090deg) ;}
</style>
Note: Make sure you add Popular Posts widget to your blogger sidebar. 

4. Now save your template,

5. Edit your Popular Posts widget setting into something like this...


6. Save it.


Refresh your blog to see the result. Cool huh? Good job!


Leave your comment!

Monday, December 26, 2011

How To Create Google Plus Fan Page For Blogger

Google Plus has launch a Google Plus Fan Page. It's similar to Facebook Fan Page. You can use Google Plus Fan Page for business to promote your products, events, etc. This is how to create and add it into your blog.

Create Google + Fan Page
1. First, go to this page, click on the Product or Brand.

2. Enter the Blog Title and URL, select Category

3. Tick the Agree Page Terms check-box and Click on Create Button.

4. Enter the Tagline and Upload a Profile photo.

6. You're page is almost done, click the Share on Google+ button and Finally Click the Finish button.


Add Fan Page Badge to your Blog
Grow your fans or follower by adding this badge to your blog.

1. Go to Get Started page, click the get the Badge link.

2. Choose a Style of Badge and Language (Leave the Advanced options to Default).


3. There is 2 code to add into your blog.
4. Go to Blogger Dashboard > Design > Edit HTML
5. Search for the </head> tag, add the Code #1 section before it.
6. Save your template.
7. Then, add the Code2 section in HTML/JavaScript gadget and place where you want the badge to be appear.

Finish. That's it! Enjoy! Leave your comment yeah!

Saturday, December 10, 2011

How To Change Linkwithin "You might also like" Message in Blooger

Do you have Linkwithin Related post widget? You want to change the Linkwithin message to another message? Sure you can. Only add some code into it. Let's know how.


Add the red code, above your Linkwithin code:
<script>linkwithin_text='YOUR NEW LINKWITHIN MESSAGE :'</script>
YOUR LINKWITHIN CODE

Yeah, that's all you need. Refresh to see the result.

Hope you like it.

Thursday, November 10, 2011

How To Add Scroll For Blog Archive in Blogger

Salam.

Your blog archive is too damn long to the bottom? Do you wanna add a scroll to your blog? Yes, you just to do this few steps to make your blog archive looks like this.


STEPS:
1. Go to your Dashboard >> Design >> Edit HTML >> Check Expand Widget Templates.

2. Search this code (Ctrl + F), ]]></b:skin>

3. Put this code below, after ]]></b:skin>
#BlogArchive1 .widget-content{
height:300px;
width:auto;
overflow:auto;
}

4. You can change the scroll height by edit the code in red:

5. Save. Refresh to see the result.


+ For more tutorial, just see through the labels.

Tuesday, October 25, 2011

How To Make Facebook Like Box Like Wordpress

Wanna have Facebook Like Box like this? Just like in Wordpress. Watch DEMO [click]


You only need to follow this few steps. Let's start.

INSTRUCTION:
1. Go to your Dashboard >> Design >> Page Element >> Add a Gadget.


2. Paste this code in.
<center>
<iframe frameborder="0" href="%0A%0AYOUR FAN PAGE URL%0A%0A" scrolling="no" src="http://www.facebook.com/plugins/fan.php?id=%0A%YOUR FAN PAGE ID%0A%0A&amp;width=292&amp;height=250&amp;connections=25&amp;stream=false&amp;header=false&amp;logobar=false&amp;css=http://howtohouse.googlecode.com/files/fblike.css" style="height: 230px; width: 85%;"></iframe>
<iframe allowtransparency="true" frameborder="0" scrolling="no" src="http://www.facebook.com/plugins/like.php?href=%0A%0AYOUR FAN PAGE URL%0A%0A&amp;send=false&amp;layout=standard&amp;width=292&amp;show_faces=false&amp;action=like&amp;colorscheme=light&amp;font&amp;height=40" style="border: none; height: 40px; overflow: hidden; width: 250px;"></iframe></center>
3. Change:
YOUR FAN PAGE URL- Where to find? Just go to your fan page. Copy URL in the URL bar.


YOUR FAN PAGE ID - On your fan page, click on the Edit Info and copy the ID from the URL bar.


4. Save and FINISH!

Do you like it? ENJOY!

Thursday, September 22, 2011

How To Create jQuery Content Slider in Blogger

Do you know what is content slider? It's like a slideshow. You can watch the demo.


Like it? Let's add it.

Steps:
1. Go to your Dashboard >> Design >> Edit HTML >> Check Expand Widget Templates.

2. Search this code (Ctrl + F), ]]></b:skin>

3. Copy below code and paste it just before the ]]></b:skin> tag.
#contentSlide {
border: 1px solid #000;
background:#212421;
height:263px;
padding:10px 0;
}
#slideshow {
margin:0 auto;
width:640px;
height:263px;
background:transparent url(http://lh6.ggpht.com/_dfnTVAxeWMI/SlTPJpS_axI/AAAAAAAABYA/JS60KVWJ9GQ/bg_slideshow.jpg) no-repeat 0 0;
position:relative;
}
#slideshow #slidesContainer {
margin:0 auto;
width:560px;
height:263px;
overflow:auto; /* allow scrollbar */
position:relative;
}
#slideshow #slidesContainer .slide {
margin:0 auto;
width:540px; /* reduce by 20 pixels of #slidesContainer to avoid horizontal scroll */
height:263px;
}
.control {
display:block;
width:39px;
height:263px;
text-indent:-10000px;
position:absolute;
cursor: pointer;
}
#leftControl {
top:0;
left:0;
background:transparent url(http://lh6.ggpht.com/_dfnTVAxeWMI/SlT8KH99FgI/AAAAAAAABZM/e9gXvHjzltU/control_left.jpg) no-repeat 0 0;
}
#rightControl {
top:0;
right:0;
background:transparent url(http://lh6.ggpht.com/_dfnTVAxeWMI/SlT8KMpFpxI/AAAAAAAABZQ/a207Rx0XuiU/control_right.jpg) no-repeat 0 0;
}

.slide h2, .slide p {
margin:15px;
}
.slide h2 {
font:italic 24px Georgia, "Times New Roman", Times, serif;
color:#212421;
letter-spacing:-1px;
}
.slide img {
float:right;
margin:0 15px;
padding: 1px;
background-color: #212421;
border: 1px solid #999;
}

4.  Now, search this code (Ctrl + F), </head>

5.  Copy below code and paste it just before the </head> tag.
<script src='http://ajax.googleapis.com/ajax/libs/jquery/1.3.2/jquery.min.js' type='text/javascript'/>

<script type='text/javascript'>
//<![CDATA[
$(document).ready(function(){var currentPosition=0;var slideWidth=560;var slides=$('.slide');var numberOfSlides=slides.length;$('#slidesContainer').css('overflow','hidden');slides.wrapAll('<div id="slideInner"></div>').css({'float':'left','width':slideWidth});$('#slideInner').css('width',slideWidth*numberOfSlides);$('#slideshow').prepend('<span class="control" id="leftControl">Clicking moves left</span>').append('<span class="control" id="rightControl">Clicking moves right</span>');manageControls(currentPosition);$('.control').bind('click',function(){currentPosition=($(this).attr('id')=='rightControl')?currentPosition 1:currentPosition-1;manageControls(currentPosition);$('#slideInner').animate({'marginLeft':slideWidth*(-currentPosition)})});function manageControls(position){if(position==0){$('#leftControl').hide()}else{$('#leftControl').show()}if(position==numberOfSlides-1){$('#rightControl').hide()}else{$('#rightControl').show()}}
});
//]]>

6. Save your template. Now go to your Dashboard >> Design >> Page Element >> Add a Gadget >> 'HTML/Javascript'.

7.  Add the code below;
<!-- Slideshow HTML START-->
<div id="contentSlide"><div id="slideshow">
<div id="slidesContainer">

<div class="slide">
<h2>CONTENT TITLE</h2>
<p><a href="POST URL"><img alt="" width="215" src="IMAGE URL" height="145"/></a>POST SUMMARY</p>
</div>

<div class="slide">
<h2>CONTENT TITLE</h2>
<p><a href="POST URL"><img alt="" width="215" src="IMAGE URL" height="145"/></a>POST SUMMARY</p>
</div>

<div class="slide">
<h2>CONTENT TITLE</h2>
<p><a href="POST URL"><img alt="" width="215" src="IMAGE URL" height="145"/></a>POST SUMMARY</p>
</div>

<div class="slide">
<h2>CONTENT TITLE</h2>
<p><a href="POST URL"><img alt="" width="215" src="IMAGE URL" height="145"/></a>POST SUMMARY</p>
</div>

<div class="slide">
<h2>CONTENT TITLE</h2>
<p><a href="POST URL"><img alt="" width="215" src="IMAGE URL" height="145"/></a>POST SUMMARY</p>
</div>

</div>
</div></div>
<!-- Slideshow HTML END -->

8.  To add new slideshow, just add this code;
<div class="slide">
<h2>CONTENT TITLE</h2>
<p><a href="POST URL"><img alt="" width="215" src="IMAGE URL" height="145"/></a>POST SUMMARY</p>
</div>

DONE!

Thursday, September 15, 2011

How To Add Colorful Effect For Your Links For Blogger


Let's add some fun to your blog by adding cool effect to your links when your visitors hover it. It’ll be lighting and colorful. It's easy and let's do it.


Steps:
1. Go to your Dashboard >> Design >> Page Element >> Add a Gadget.


2. Paste this code below inside :
<script type='text/javascript'>

 //<![CDATA[

 var rate = 25;

 if (document.getElementById)
  window.onerror=new Function("return true")

 var objActive;  // The object which event occured in
  var act = 0;    // Flag during the action
  var elmH = 0;   // Hue
  var elmS = 128; // Saturation
  var elmV = 255; // Value
  var clrOrg;     // A color before the change
  var TimerID;    // Timer ID

 if (document.all) {
  document.onmouseover = doRainbowAnchor;
  document.onmouseout = stopRainbowAnchor;
  }
  else if (document.getElementById) {
  document.captureEvents(Event.MOUSEOVER | Event.MOUSEOUT);
  document.onmouseover = Mozilla_doRainbowAnchor;
  document.onmouseout = Mozilla_stopRainbowAnchor;
  }

 function doRainbow(obj)
  {
  if (act == 0) {
  act = 1;
  if (obj)
  objActive = obj;
  else
  objActive = event.srcElement;
  clrOrg = objActive.style.color;
  TimerID = setInterval("ChangeColor()",100);
  }
  }


 function stopRainbow()
  {
  if (act) {
  objActive.style.color = clrOrg;
  clearInterval(TimerID);
  act = 0;
  }
  }


 function doRainbowAnchor()
  {
  if (act == 0) {
  var obj = event.srcElement;
  while (obj.tagName != 'A' && obj.tagName != 'BODY') {
  obj = obj.parentElement;
  if (obj.tagName == 'A' || obj.tagName == 'BODY')
  break;
  }

 if (obj.tagName == 'A' && obj.href != '') {
  objActive = obj;
  act = 1;
  clrOrg = objActive.style.color;
  TimerID = setInterval("ChangeColor()",100);
  }
  }
  }


 function stopRainbowAnchor()
  {
  if (act) {
  if (objActive.tagName == 'A') {
  objActive.style.color = clrOrg;
  clearInterval(TimerID);
  act = 0;
  }
  }
  }


 function Mozilla_doRainbowAnchor(e)
  {
  if (act == 0) {
  obj = e.target;
  while (obj.nodeName != 'A' && obj.nodeName != 'BODY') {
  obj = obj.parentNode;
  if (obj.nodeName == 'A' || obj.nodeName == 'BODY')
  break;
  }

 if (obj.nodeName == 'A' && obj.href != '') {
  objActive = obj;
  act = 1;
  clrOrg = obj.style.color;
  TimerID = setInterval("ChangeColor()",100);
  }
  }
  }


 function Mozilla_stopRainbowAnchor(e)
  {
  if (act) {
  if (objActive.nodeName == 'A') {
  objActive.style.color = clrOrg;
  clearInterval(TimerID);
  act = 0;
  }
  }
  }


 function ChangeColor()
  {
  objActive.style.color = makeColor();
  }


 function makeColor()
  {
  // Don't you think Color Gamut to look like Rainbow?

 // HSVtoRGB
  if (elmS == 0) {
  elmR = elmV;    elmG = elmV;    elmB = elmV;
  }
  else {
  t1 = elmV;
  t2 = (255 - elmS) * elmV / 255;
  t3 = elmH % 60;
  t3 = (t1 - t2) * t3 / 60;

 if (elmH < 60) {
  elmR = t1;  elmB = t2;  elmG = t2   t3;
  }
  else if (elmH < 120) {
  elmG = t1;  elmB = t2;  elmR = t1 - t3;
  }
  else if (elmH < 180) {
  elmG = t1;  elmR = t2;  elmB = t2   t3;
  }
  else if (elmH < 240) {
  elmB = t1;  elmR = t2;  elmG = t1 - t3;
  }
  else if (elmH < 300) {
  elmB = t1;  elmG = t2;  elmR = t2   t3;
  }
  else if (elmH < 360) {
  elmR = t1;  elmG = t2;  elmB = t1 - t3;
  }
  else {
  elmR = 0;   elmG = 0;   elmB = 0;
  }
  }

 elmR = Math.floor(elmR).toString(16);
  elmG = Math.floor(elmG).toString(16);
  elmB = Math.floor(elmB).toString(16);
  if (elmR.length == 1)    elmR = "0"   elmR;
  if (elmG.length == 1)    elmG = "0"   elmG;
  if (elmB.length == 1)    elmB = "0"   elmB;

 elmH = elmH   rate;
  if (elmH >= 360)
  elmH = 0;

 return '#'   elmR   elmG   elmB;
  }

 //]]>

 </script>

3. Save it. Done!
You can change;
var rate = 25;
The code is to control the speed of color transformation by increasing or decreasing the number.

Cheers! 

Sunday, September 11, 2011

How To Add Image Magnifier in Blogger

This the creative hack to enlarge or zoom image in blogger. With this hack, you will be able to zoom in the image in blogger by clicking on the image. It's a simple hack. Only need a few steps to add it into your blog.


Steps:
1. Go to your Dashboard >> Design >> Edit HTML.

2. Search this code (Ctrl + F), </body>

3. Copy and paste this just CODE above </body> tag.

4. Save your template.

How to apply Image Magnify:

• Add this class="magnify" data-magnifyby="1.5"  on each image you want to magnify. 

• You need to go to Edit HTML section instead of Compose section. Example :
<img class="magnify" data-magnifyby="1.5" src="Image URL" />
• Finish.

Nice and easy. :)

Tuesday, February 15, 2011

Add Speech Bubbles Tooltip in Blogger

What is Speech Bubbles Tooltip?

Description : Speech Bubbles Tooltip lets you add tooltips to links using either the value of the link's title attribute, or rich HTML defined all inside a single HTML file and fetched using Ajax instead.


Now, let's add it to your blog.

Steps :
1. Go to your Dashboard >> Design >> Edit HTML >> Check Expand Widget Templates.

2. Search this code (Ctrl + F), </head>

3. Copy and paste this just CODE above </head> tag.

4. Save your template.

5. To Apply the Speech Bubbles Tooltip you need to add title="YOUR DESCRIPTION" class="addspeech" on each link you want the tooltip to show up. Example :
<a title="YOUR DESCRIPTION" class="addspeech" href=http://www.place2how-to.com>HOW-TO HOUSE</a>

Yeah! It's DONE! Like it? You gonna like it!

You also can add this style of tooltip.


source : dynamicdrive

Sunday, February 13, 2011

Change Newer Posts and Older Posts with Post Titles like Worpress

Do you want to change your Newer Posts and Older Posts with your Post titles? We always see this trick only in wordpress blogs. But now, you can apply it into your blog. It also can attract more reader because they can stop to see your post title. Let's try it. Just in 3 steps.


Example : After apply the hack code

Steps :
1. Go to your Dashboard >> Design >> Page Element >> Add a Gadget.


2. Paste this code below in it.

3. Save & DONE!


Refresh your blog to see the result.

Friday, February 11, 2011

How To Change Blogger Comment Box Width and Height

Do you want to change the width and height of blogger comment box to make it look nice and fit your post page width. You only need to modify this code.

1. Go to your Dashboard >> Design >> Edit HTML >> Check Expand Widget Templates.

2. Search this code (Ctrl + F), or similar something :
<iframe allowtransparency='true' class='blogger-iframe-colorize blogger-comment-from-post' frameborder='0' height='410' id='comment-editor' name='comment-editor' src='' width='100%'/>

3. Change the bold code :

height='?' >> to any number you want.

Change it from width='100%' to any value you want but not with % anymore. Change it to px. Example : width='500px'


Example :
<iframe allowtransparency='true' class='blogger-iframe-colorize blogger-comment-from-post' frameborder='0' height='410' id='comment-editor' name='comment-editor' src='' width='500px'/>

4. Save your template & DONE!

This is a simple trick! Have a try guys. GOOD LUCK!

Tuesday, February 8, 2011

Add 'Bookmark This Site' Widget in Blogger

Bookmark page is serves to store page that you like in the browser's bookmarks. If visitors are interested with the content of your site, they will bookmark your blog/website. It will be easier to track website visitors easily. However, you can add a widget to make this bookmarking process more easier and with some style. Only use a Bookmark Site Script. See demo.


Do you wanna add it into your blog? Here we go..

Steps
1. Go to your Dashboard >> Design >> Page Element >> Add a Gadget.


2. Paste this code below in it :
<script type="text/javascript">

/***********************************************
* Bookmark site script- © Dynamic Drive DHTML code library (www.dynamicdrive.com)
* This notice MUST stay intact for legal use
* Visit Dynamic Drive at http://www.dynamicdrive.com/ for full source code
* Shared by Alfian J. @ HOW-TO HOUSE www.place2how-to.com
***********************************************/

function bookmarksite(title,url){
if (window.sidebar) // firefox
    window.sidebar.addPanel(title, url, "");
else if(window.opera && window.print){ // opera
    var elem = document.createElement('a');
    elem.setAttribute('href',url);
    elem.setAttribute('title',title);
    elem.setAttribute('rel','sidebar');
    elem.click();
}
else if(document.all)// ie
    window.external.AddFavorite(url, title);
}
</script>
<a href="javascript:bookmarksite('YOUR BLOG/SITE NAME', 'YOUR BLOG URL')">BOOKMARK THIS SITE!</a>

or you can use image for this bookmark widget, use this code :
<script type="text/javascript">

/***********************************************
* Bookmark site script- © Dynamic Drive DHTML code library (www.dynamicdrive.com)
* This notice MUST stay intact for legal use
* Visit Dynamic Drive at http://www.dynamicdrive.com/ for full source code
* Shared by Alfian J. @ HOW-TO HOUSE www.place2how-to.com
***********************************************/

function bookmarksite(title,url){
if (window.sidebar) // firefox
    window.sidebar.addPanel(title, url, "");
else if(window.opera && window.print){ // opera
    var elem = document.createElement('a');
    elem.setAttribute('href',url);
    elem.setAttribute('title',title);
    elem.setAttribute('rel','sidebar');
    elem.click();
}
else if(document.all)// ie
    window.external.AddFavorite(url, title);
}
</script>
<a href="javascript:bookmarksite('YOUR BLOG/SITE NAME', 'YOUR BLOG/SITE URL')"><img src="https://blogger.googleusercontent.com/img/b/R29vZ2xl/AVvXsEipHCOr4gn0BbrINxA-DQ1gvXND9k79FR-n3NIytZFnxsDIdHcDK6NHZfvT7fWJpwCy4Ex0q5u86RtOMg80W3usz3nO4H3Bt5VifQRkROxwj_19Cvi3d8m8K2ZfaocjkvnpMHOX-S1oGXU/" /></a>

Customization
Change details code in bold text.

YOUR BLOG/SITE NAME = replace with your blog name.

YOUR BLOG/SITE URL = replace with your blog URL.

BOOKMARK THIS SITE! = replace with your own word. (Optional)

https://blogger.googleusercontent.com/img/b/R29vZ2xl/AVvXsEipHCOr4gn0BbrINxA-DQ1gvXND9k79FR-n3NIytZFnxsDIdHcDK6NHZfvT7fWJpwCy4Ex0q5u86RtOMg80W3usz3nO4H3Bt5VifQRkROxwj_19Cvi3d8m8K2ZfaocjkvnpMHOX-S1oGXU/ = replace with your own Bookmark image.(Optional)

3. Save and DONE!

Enjoy this Bookmark Site Widget. Hopefully this widget help to increase your blog reader.


source : dynamicdrive

Add Font Resizer Widget in Blogger

You feel more comfortable reading with big or small font? Some likes big font and there is also like a small font. Some of your blog visitors may be not comfortable with the font used in your blog. So you can add a Font Resizer widget on your blog


Only use a simple script. Let's start :

1. Go to your Dashboard >> Design >> Page Element >> Add a Gadget.


2. Paste this code below in it :
<div align="center">
<script type="text/javascript" src="https://sites.google.com/site/howtohouse/hth-scripts/howtohouse-textsizer.js?attredirects=0&d=1">

/***********************************************
* Document Text Sizer- Copyright 2003 - Taewook Kang.  All rights reserved.
* Coded by: Taewook Kang (http://www.txkang.com)
* This notice must stay intact for use
* Visit http://www.dynamicdrive.com/ for full source code
* Shared by Alfian J. @ HOW-TO HOUSE www.place2how-to.com
***********************************************/

</script>
<a href="javascript:ts('body',1)">  Larger Font</a> | <a
href="javascript:ts('body',-1)">  Smaller Font</a
href="javascript:ts('body',-1)">
<hr/>
</div>
3. Save & DONE!

Now your blog reader can choose whether to read in bigger font or smaller font.


source : dynamicdrive

Sunday, February 6, 2011

Add Breadcrumb Navigation in Blogger

Breadcrumb navigation? What is breadcrumb navigation? Definition of breadcrumb :
Breadcrumbs or breadcrumb trail is a navigation aid used in user interfaces. It gives users a way to keep track of their location within programs or documents. - Wikipedia.

Breadcrumb navigation looks something like this :


Do you like it? Wanna add Breadcrumb in your blog? Let's do it.

1. Go to your Dashboard >> Design >> Edit HTML >> Check Expand Widget Templates.

2. Search this code (Ctrl + F), ]]></b:skin>

3. Add the code below, just before the ]]></b:skin>
.breadcrumbs {
padding:5px 5px 5px 0px;
margin: 0px 0px 15px 0px;
font-size:95%;
line-height: 1.4em;
border-bottom:3px double #333333;
}

4. Now search this code (Ctrl + F),
<b:include data='top' name='status-message'/>

5. Replace it with this code,
<b:include data='top' name='status-message'/>
<b:include data='posts' name='breadcrumb'/>

6. Then, find this code,
<b:includable id='main' var='top'>

7. Replace it with this code.

8. Save your template and DONE!

Also, this hack is good for your blog SEO. Enjoy this Breadcrumb Navigation.


Followers

Sponsor

 
Powered by Blogger.