Monday, September 12, 2011

How To Add Google Plus Profile Widget in Blogger

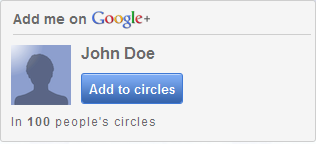
This widget will show real time followers stats of Google Plus circles and also with a “Add me To Circles”  Button. It's completely customizable. The number of followers displayed automatically. You just need to get the code and put it on your blog. Add it now!

Steps:
1. Go to Google Plus Widget page.

2.  Click the "Get Widget" button.

3. Enter your Google+ ID in the Basic Settings tab. Get your Profile ID on your Google+ profile page.


4. You can the widget width as you desire. You can also change the language of the widget from basic settings.  Currently 9 languages are supported.

5. Once you done customizing, click "Get Code" button to get your widget code.

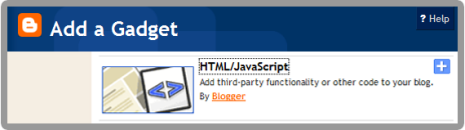
6. Now, go to your Dashboard ->> Design ->> Page Element ->> Add a Gadget ->> HTML/Javascript.


7. Paste the code in.

8. Save and DONE!

Do you like it? View the  Google+ widget demo. Click here

Enjoy! :)

How To Add Static Twitter Follow Me Button in Blogger

Wanna make your visitor to easy to follow you in Twitter? Twitter is the good social network to promote your blog. Why? Because Twitter is second most popular social network with 200,000,000 estimated unique monthly visitors according to eBizMBA. This widget is the best to do so . Let's add it.

Steps:
1. Go to go2web20 site who provide this button.

2. Fill a small form to customize your Twitter "Follow Me" button. Such as Your Twitter Name, Label, Color.

3. When you finish customizing, click the Update Code button.

4. Now, go to your Dashboard >> Design >> Page Element >> Add a Gadget.


5. Paste the code in.

6. Save and finish.

Done and enjoy!

Sunday, September 11, 2011

How To Add Image Magnifier in Blogger

This the creative hack to enlarge or zoom image in blogger. With this hack, you will be able to zoom in the image in blogger by clicking on the image. It's a simple hack. Only need a few steps to add it into your blog.


Steps:
1. Go to your Dashboard >> Design >> Edit HTML.

2. Search this code (Ctrl + F), </body>

3. Copy and paste this just CODE above </body> tag.

4. Save your template.

How to apply Image Magnify:

• Add this class="magnify" data-magnifyby="1.5"  on each image you want to magnify. 

• You need to go to Edit HTML section instead of Compose section. Example :
<img class="magnify" data-magnifyby="1.5" src="Image URL" />
• Finish.

Nice and easy. :)

Thursday, September 8, 2011

How To Add Twitter Flying Bird in Blogger

You have a blog and twitter account? Many of you already have their own accounts. This widget will give your visitors to easily communicate with your twitter account. The bird widget will fly over the site. it's compatible with all browsers. You will love it.

Steps
1. Go to your Dashboard >> Design >> Page Element >> Add a Gadget.


2. Paste this code below in it :
<script src='https://sites.google.com/site/howtohouse/hth-scripts/twitterflybird.js' type='text/javascript'>
</script>
<script type='text/javascript'>
var twitterAccount = "howtohouse";
var tweetThisText = " <data:blog.pageTitle/> : <data:blog.url/> ";
tripleflapInit();
</script>

3. Replace howtohouse with your twitter account username.

4. Save and DONE!

Fly bird fly! :)


#credits: way2blogging

Wednesday, September 7, 2011

How To Add Floating Share Button Beside The Post

This widget make it easy for visitors to share any articles of your blog at any time. This widget is floating on the edge of your blog even if you scroll down. By a single click, your visitors can spread the contents of your blog to the world.

Add it to your blog.


1. Go to your Dashboard >> Design >> Page Element >> Add a Gadget.


2. Paste this code below in it :
<style>

#floatdiv {
position:fixed;
bottom:15%;
margin-left:-75px;
z-index:10;
float:left;
padding-bottom:2px;

}

#mbtsidebar {
        background:#fff;
        border-top:1px solid #ddd;
        border-left:1px solid #ddd;
        border-bottom:1px solid #ddd;
        border-radius:5px;
       -moz-border-radius:5px;
       -webkit-border-radius:5px;
        padding-left:5px;
        width:60px;
        margin:0 0 0 5px;
}

.fb_share_count_top {width:52px !important;}

.fb_share_count_top, .fb_share_count_inner {-moz-border-radius:3px;-webkit-border-radius:3px;}

.FBConnectButton_Small, .FBConnectButton_RTL_Small {width:52px !important; -moz-border-radius:3px;/*bs-fsmsb*/-webkit-border-radius:3px;}

.FBConnectButton_Small .FBConnectButton_Text {padding:2px 2px 3px !important;-moz-border-radius:3px;-webkit-border-radius:3px;font-size:8px;}
</style>

<div id="floatdiv">
<div id="mbtsidebar">
    <table cellpadding="1px" cellspacing="0">


    <tr>
    <td style="padding:5px 0px 0px 0;">
<a href="http://twitter.com/share" class="twitter-share-button" data-count="vertical" data-via="howtohouse">Tweet</a><script type="text/javascript" src="http://platform.twitter.com/widgets.js"></script>
    </td>
    </tr>

    <tr>
    <td style="padding:5px 0 2px 0;">
    <a name="fb_share" type="box_count" href="http://www.facebook.com/sharer.php">Share</a><script src="http://static.ak.fbcdn.net/connect.php/js/FB.Share" type="text/javascript"></script>
    </td>
    </tr>
    <tr>
    <td style=" padding:5px 0px 0px 0px;">

<script src='http://apis.google.com/js/plusone.js' type='text/javascript'> {lang: &#39;en-US&#39;} </script>

<g:plusone size="Tall" expr:href="data:post.url">
    </g:plusone></td>
    </tr>
<tr>
    <td>
<p style=" line-height:0px; font-size:10px; font-weight:bold; text-align:center;"><a style="color:#D3D3D3;" href="http://adf.ly/2cZxG" target="_blank">Want it?</a></p>
    </td>
    </tr>
    </table>
</div>
</div>

3. Save & DONE!

Customization

Align left or right, edit : margin-left:-75px;
Background color, edit : background:#fff;

If you want the widget to appear only on the post page, follow this tutorial.

Enjoy!

[source]


Followers

Sponsor

 
Powered by Blogger.